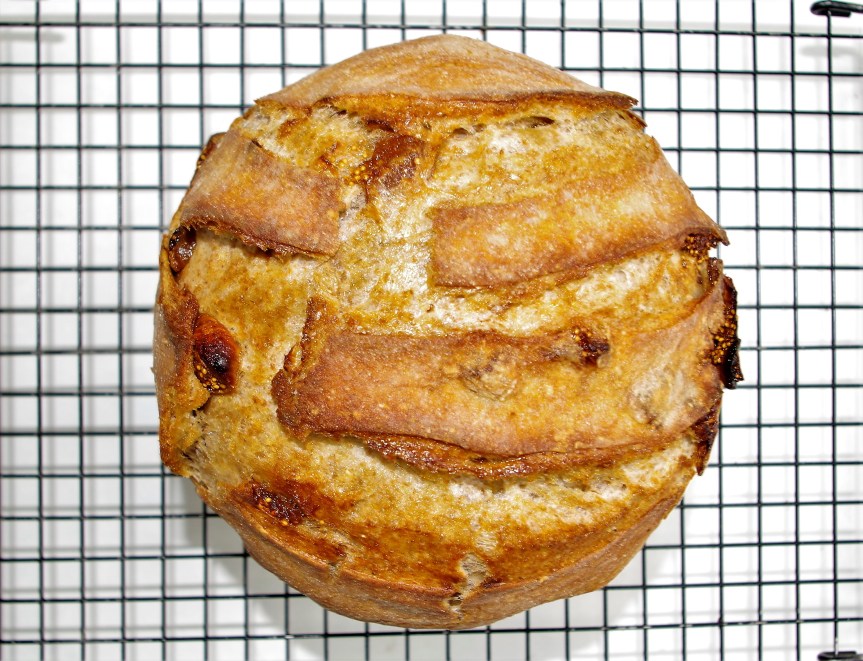
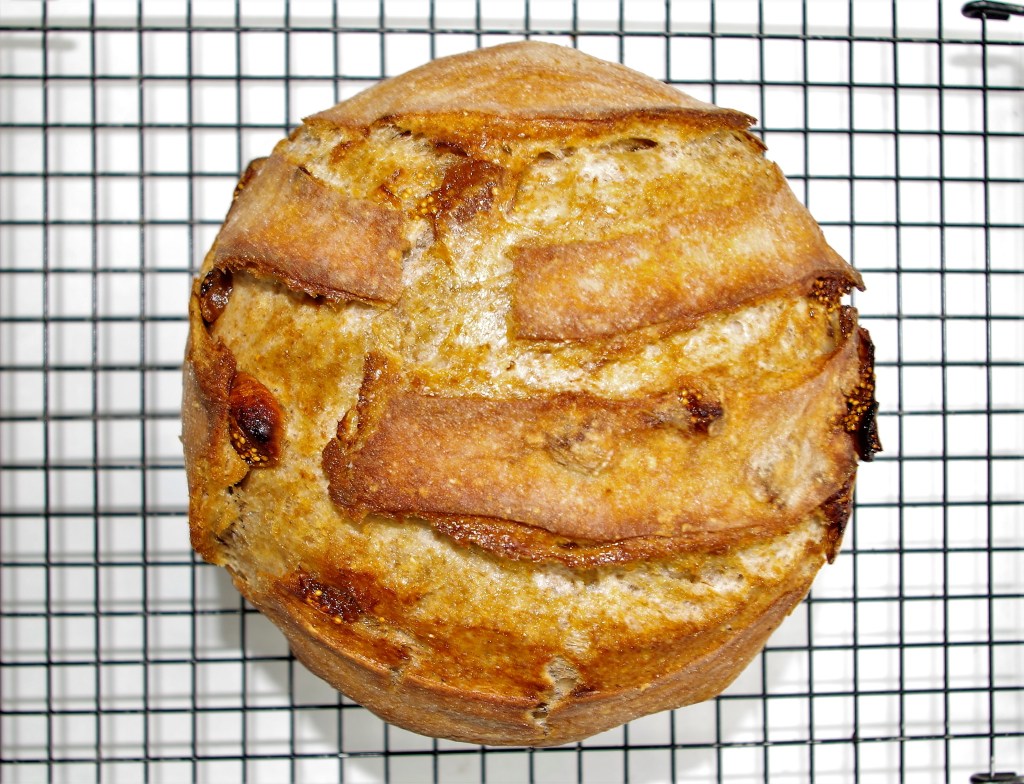
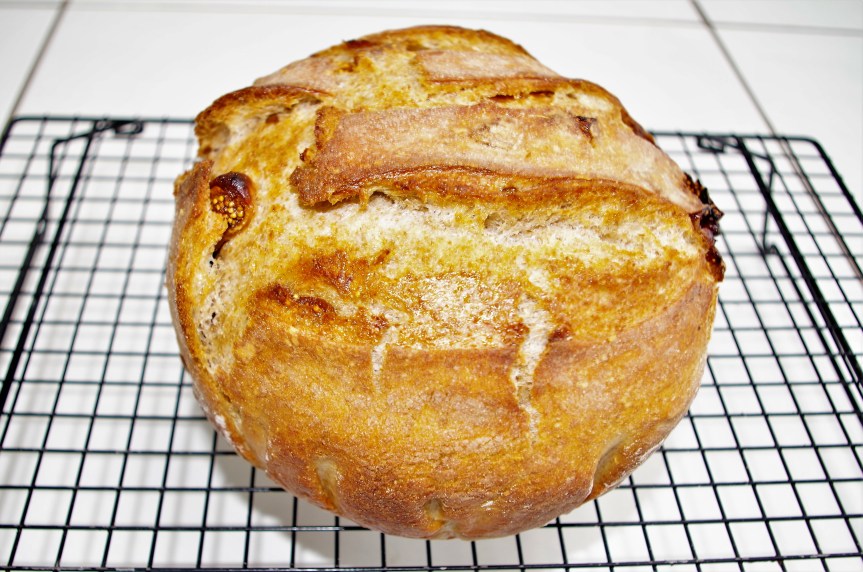
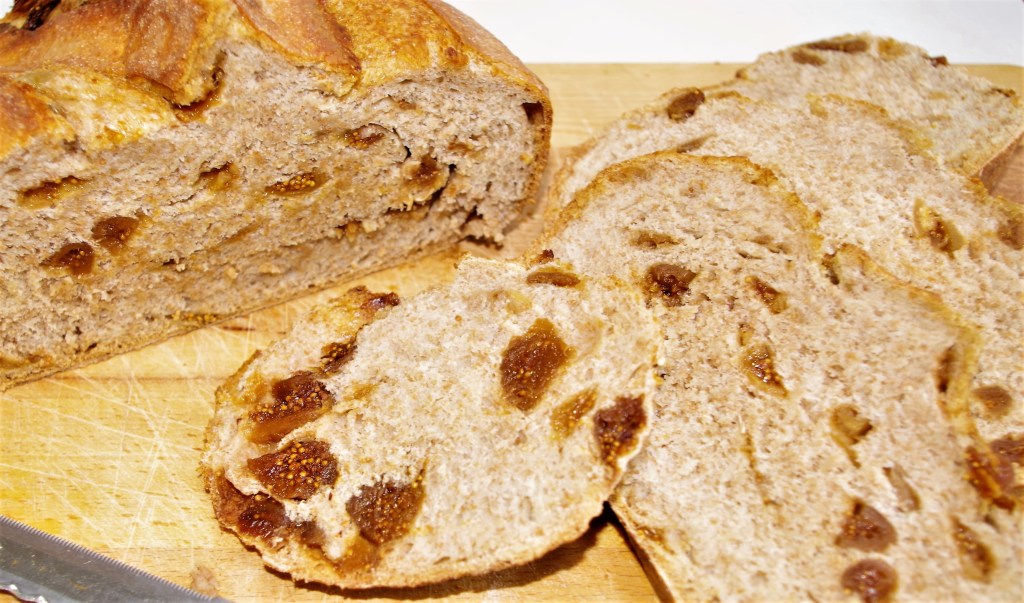
This was a bit of an experiment. I think it worked reasonably well. I’m not saying it can’t be improved, but the actual loaf, although a little denser in texture than I’d hoped for, had a nice crunchy crust and a good flavour. Worth trying again and working on.
First, I’d better explain what I mean by “semi-sourdough”. I don’t like the term “cheat’s sourdough”; I didn’t cheat, I modified – big difference. I was using spelt flour so, rather than just rely on my usual starter, I simply added 2g of dried instant yeast.

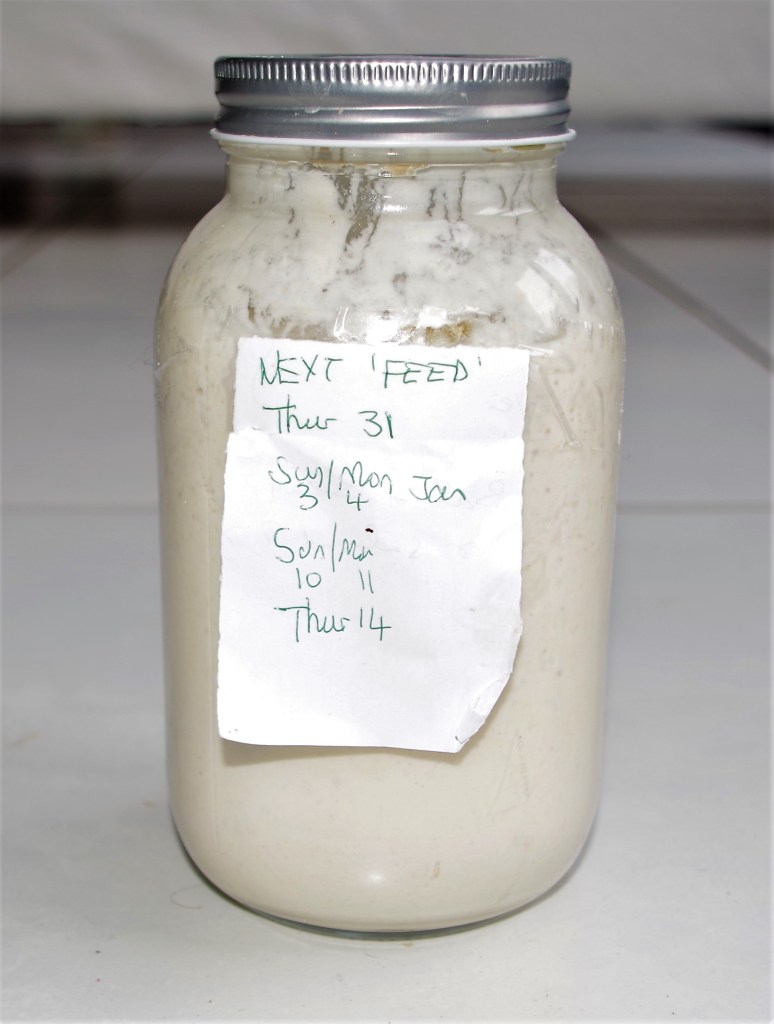
I created my starter about a year ago. It’s a strong white flour mixture, not a spelt starter. I’ve used it regularly for over a year. I keep it in the fridge and feed it every 3 – 4 days. Usually I take out 200ml/7oz and use that to create a loaf. I replenish my starter with 100g/3.5oz strong white flour and 100ml/3.5fl oz tap water. This has worked well every time so far.
Makes: One loaf, about 10 thick slices of varied size
Time: Hard to say really. About an hour the night before baking. The next day the dough should have risen by the time you’ve had breakfast, but don’t make any plans to go out far in the morning. Knocking it back and adding the filling shouldn’t take much longer than 30 minutes. The second prove can vary from about an hour to three hours. Baking time is more specific – allow 50 – 60 minutes.
Ingredients
- 200g/7oz Starter (assuming 100g flour/100ml water)
- 300ml/10fl oz Warm water
- 325g/11oz Spelt flour
- 125g/4.5oz White bread flour
- 10g/0.25oz Salt
- 2g Instant dried yeast
- 10g/0.25oz Caster sugar
- 200g/7oz – 250g/9oz Figs, chopped
- Olive oil for brushing (optional)
- Fine Semolina (optional) or flour for dusting inside the banneton
Method
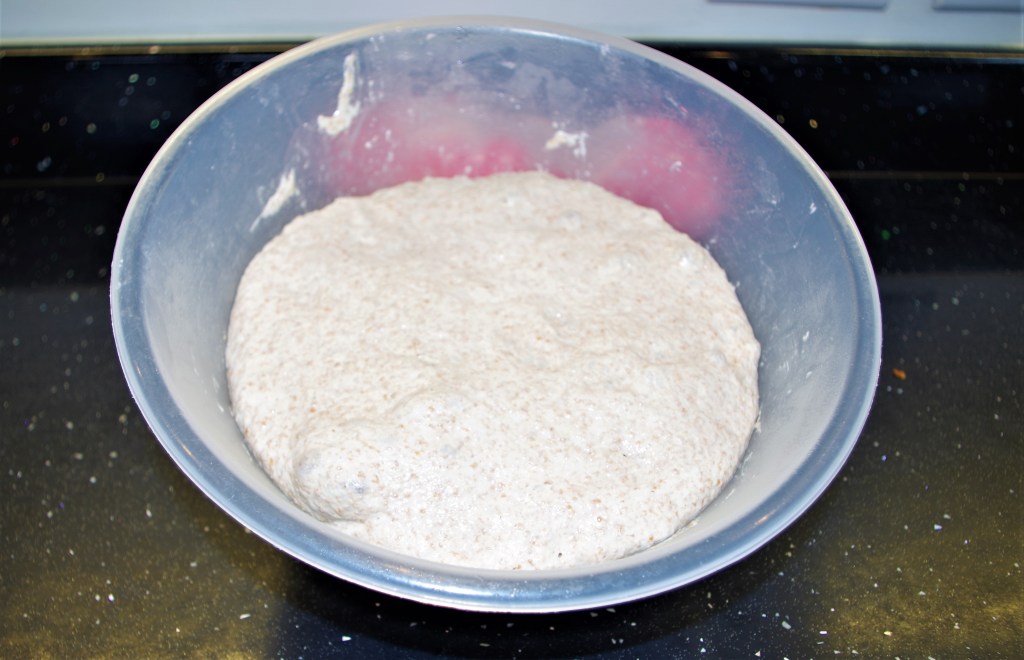
1. Tip the starter into a large bowl. Add water and stir to mix well.
2. Add in everything else except the figs and optional extras. Mix to a dough.
3. Turn it over on itself every 10 – 12 minutes for about an hour. (This is instead of kneading. If you prefer kneading, go for it.)
4. Cover and leave in a cool place overnight. (A garage is suitable in UK, except maybe in the height of summer, but that’s only a few days, isn’t it?)
5. The following morning, knock back the dough and knead for a few minutes.
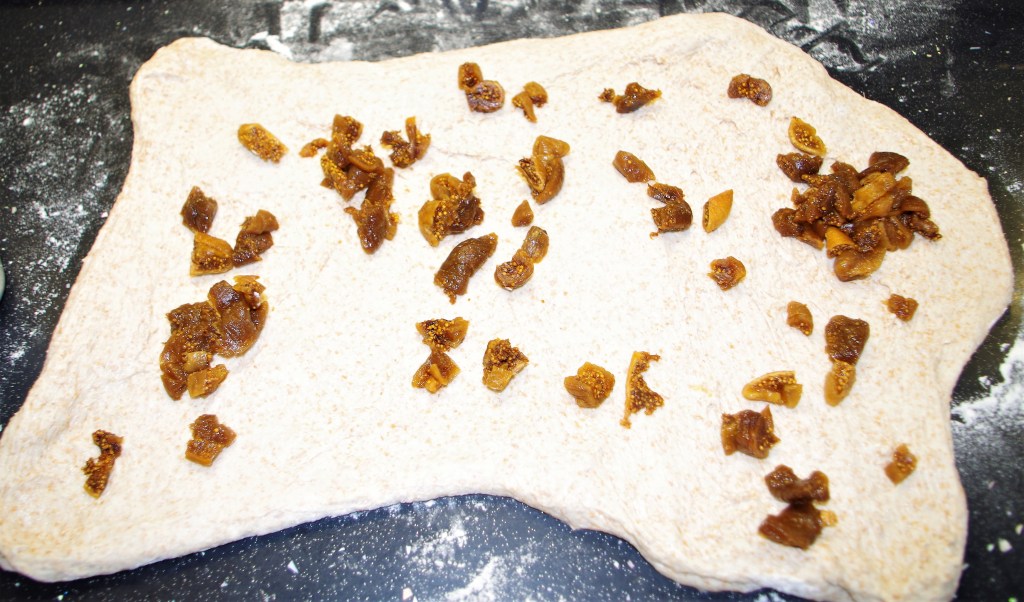
6. If you haven’t already done so, weigh out and chop the figs. Make sure you remove the stalks, which are unpleasant to eat.

7. Flatten out the dough on a floured surface and add half the chopped figs. Fold and knead again then repeat with the rest of the figs. Form the dough into a ball.
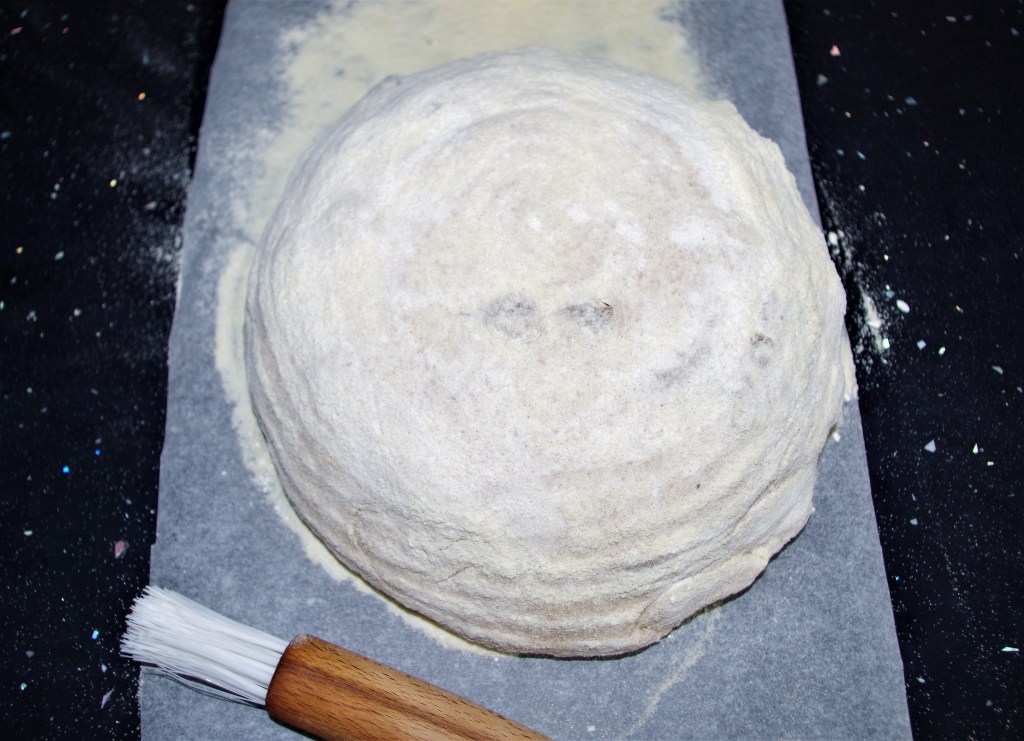
8. Put the ball of dough into a well floured banneton*. Cover and leave at room temperature until risen. (*I’m still experimenting with ways to avoid the dough sticking in my banneton. I must admit, I’ve not quite perfected this yet. Currently I’m using fine semolina, which may be the answer.)

9. After a while – maybe an hour or two, depending on the speed of rise – put a Dutch oven in your oven and turn it on to heat up to 230C / fan 210C / 450F / Gas 8.
N.B. If you don’t have a Dutch oven you could use a lidded Pyrex dish, or even cover one with foil. If none of these is possible then simply put a baking sheet or baking stone in the oven to heat up. You could also place a baking tray at the bottom of the oven to put some ice in when you bake. This will create steam to give a nice crust.
10. Once the dough has risen, tip it onto a piece of parchment and brush off the excess flour/semolina. Use a very sharp knife or lame to make several cuts on the top. If your dough isn’t firm enough to make clean cuts then snip several cuts with a pair of scissors held vertically.


11. Use the parchment to transfer the dough into the Dutch oven. (The parchment can go in with the dough, just cut away any excess to avoid it folding itself into the dough.) The dough can go straight into your oven now, or you could brush it with olive oil for a dark shiny finish.
12. Bake for 10 minutes then reduce temperature by ten degrees and bake for a further 20 minutes. Remove the lid, then return to the oven for another 20 minutes with the lid off. (Having re-brushed with olive oil, if using.)

N.B. To test for doneness, tap the underside of your loaf with your knuckles. It should be firm and sound hollow.
13. For an extra crisp crust, tip the loaf out of the Dutch oven and put it back in the oven for an extra 5 minutes. Remove and cool on a wire rack.