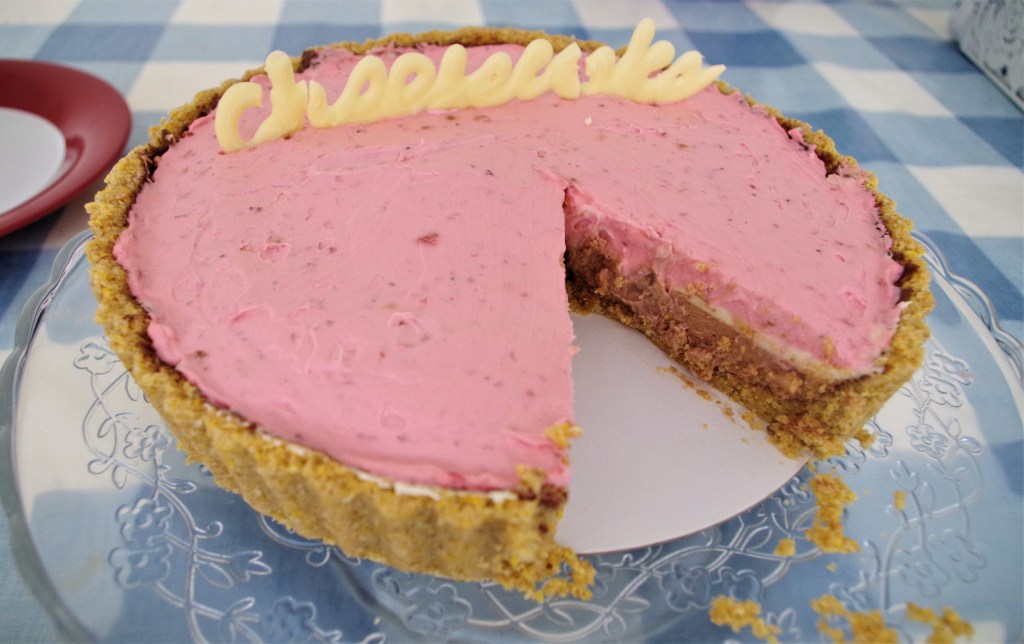
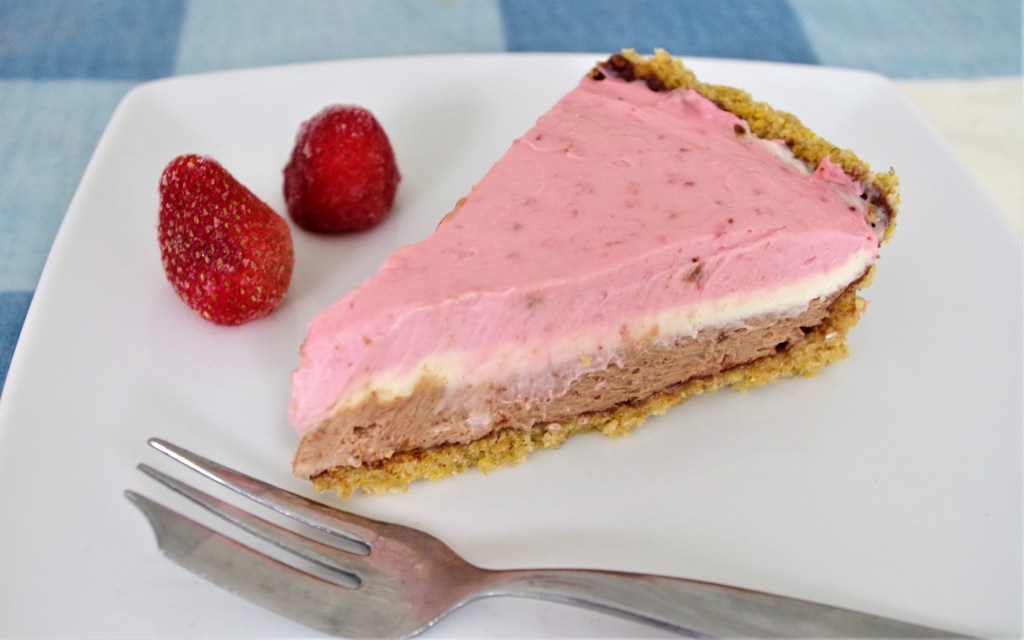
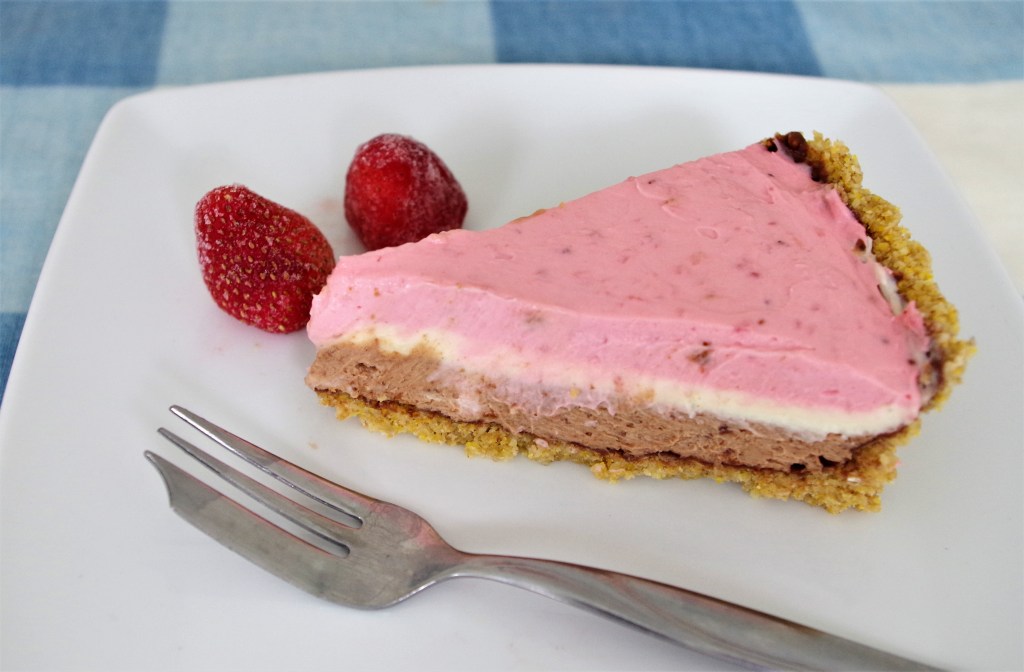
Within the crunchy crust are three luscious layers – chocolate, vanilla and strawberry – making this tart a terrific treat or a perfect pud. It could be gluten free or not, equally readily. The filling doesn’t need baking, so it’s quick and easy, but it does need to sit in the fridge a few times (which leaves you free to go and do other important things, of course.)
Serves: 8 – 10 slices
Time: 25 – 30 minutes for the base (can be made the night before). 30 minutes for everything else, but also 2 – 3 hours “fridge time”.
Level: Easy
Need: 20cm/8” loose-based tart tin

Ingredients
Gluten free base
- 50g/1¾oz polenta
- 175g/6oz oatmeal or bran
- 50g/1¾oz caster sugar
- 50g/1¾oz ground almonds
- 125g/4½oz butter
- 25ml/1fl oz golden syrup
For a non-GF base, simply replace the above dry ingredients with 325g/11oz crushed biscuits.
Basic Cheesecake filling mixture
- 250g/9oz Mascarpone
- 250g/9oz full fat cream cheese
- 250ml/9fl oz double cream
- 250g/9oz icing sugar
Chocolate bottom layer
- 125g/4½oz milk chocolate (about 30g/1oz to coat the base; the rest in the cheesecake)
Vanilla mid-layer
- 100g/3½oz white chocolate
- 1 tsp vanilla extract
Strawberry top layer
- 125g/4½oz – 150g/5½oz strawberries – could use fresh but defrosted frozen work well
- ½ tsp corn flour (This is probably gluten free, but if unsure, use xanthan gum powder instead, or leave out completely.)
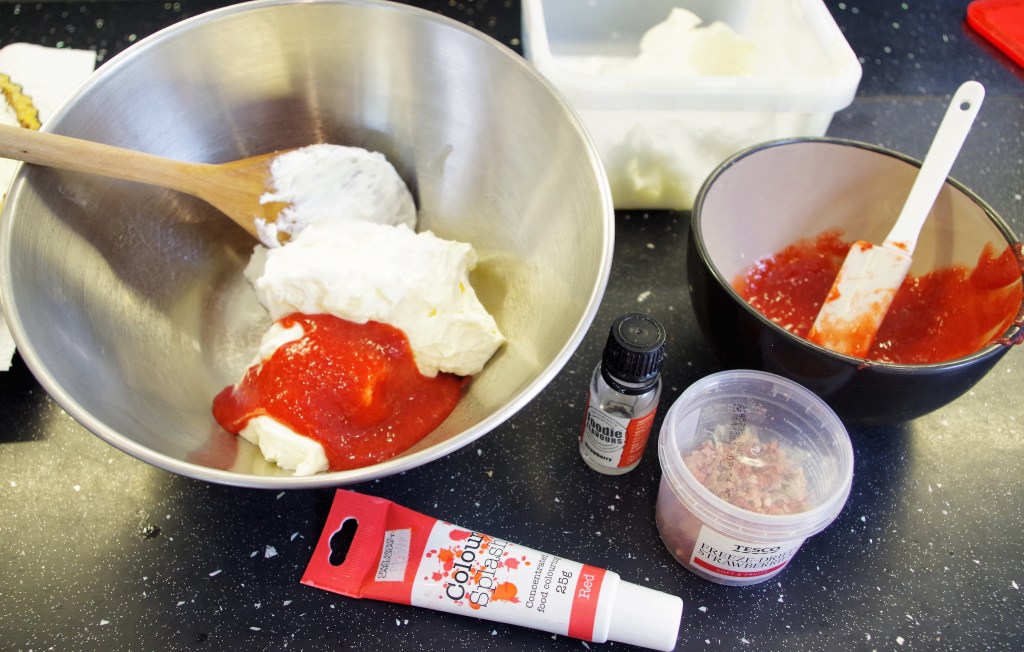
- (optional) A small amount of strawberry extract/flavour (½ tsp or a few drops if it’s highly concentrated. Check the label)
- (optional) Approx.1 Tbsp freeze dried strawberries
- Small amount of red food dye (only if needed, to boost the colour)
Method
Pre: Turn the oven on to 160°C / Fan 140°C / 325°F / Gas 3. Line the base of the tart tin with baking parchment.
1. For the base, mix together all the dry ingredients then melt the butter and golden syrup in a medium saucepan. Pour the melted butter and golden syrup onto the dry ingredients and mix well. Press into the tin and use your fingers or a spoon to ease the mixture up the sides.
2. Bake the base for 15 minutes. (NB It will rise up so, either blind bake it, or bake it as it is and carefully press down the risen material with a wooden spoon.) Set aside to cool.
3. Melt about 30g/1oz milk chocolate and gently brush it over the base*. Set aside to cool and firm up. (*I made the mistake of brushing it up the sides rather sloppily and small bits of chocolate were still visible even after the third layer had been poured on. Not exactly a major disaster, just a slight disappointment.)
4. Beat together the mascarpone, cream cheese and double cream. Sift in the icing sugar and mix before beating further. Divide this mixture between three bowls.
5. Melt the rest of the milk chocolate. Allow it to cool a little then stir it into one of the bowls. Spoon or pour this mixture over the base and place in the fridge for 30 – 60 minutes.
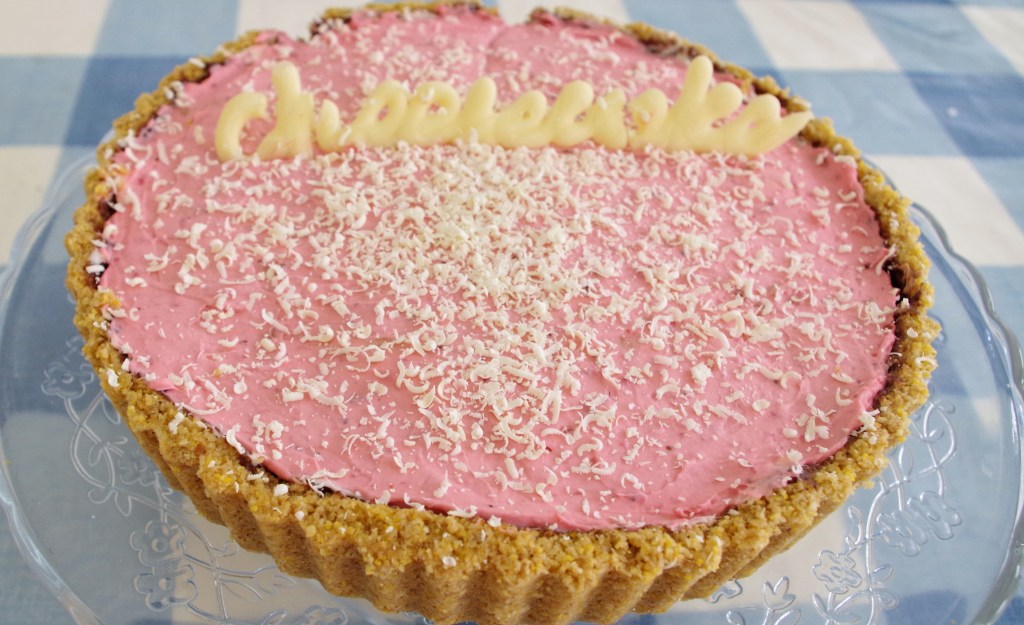
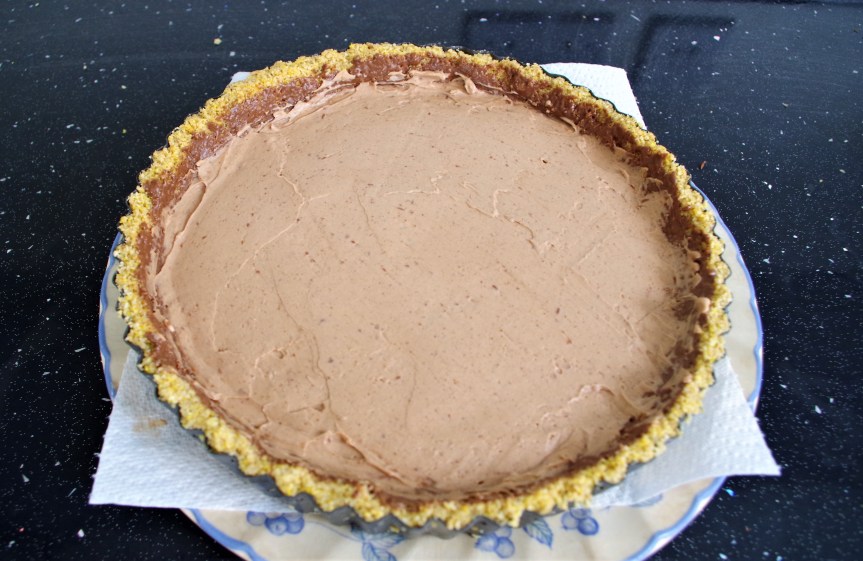
6. Melt most of the white chocolate** and repeat the procedure from step 5 with the addition of the vanilla extract. (** Keep back about 10g/¼ oz for grating over the finished cheesecake.)
7. For the top layer whizz*** the strawberries to a puree. I didn’t bother sieving the puree, but you can. Put the puree in a small saucepan with either the corn flour or xanthan gum powder. Bring to a boil then simmer for a few minutes to reduce the liquid. Allow to cool. (***I used a mini-blender, but a stick blender would probably do as well.)
8. Mix the cooled strawberry puree into the remaining bowl of cheesecake mixture. If you need to boost the colour, mix in a small amount of red food colouring. The flavouring and freeze dried strawberries can be added here too if you choose to use them. Pour or spoon the mixture onto the mid-layer and return the cheesecake to the fridge for another 30 – 60 minutes.
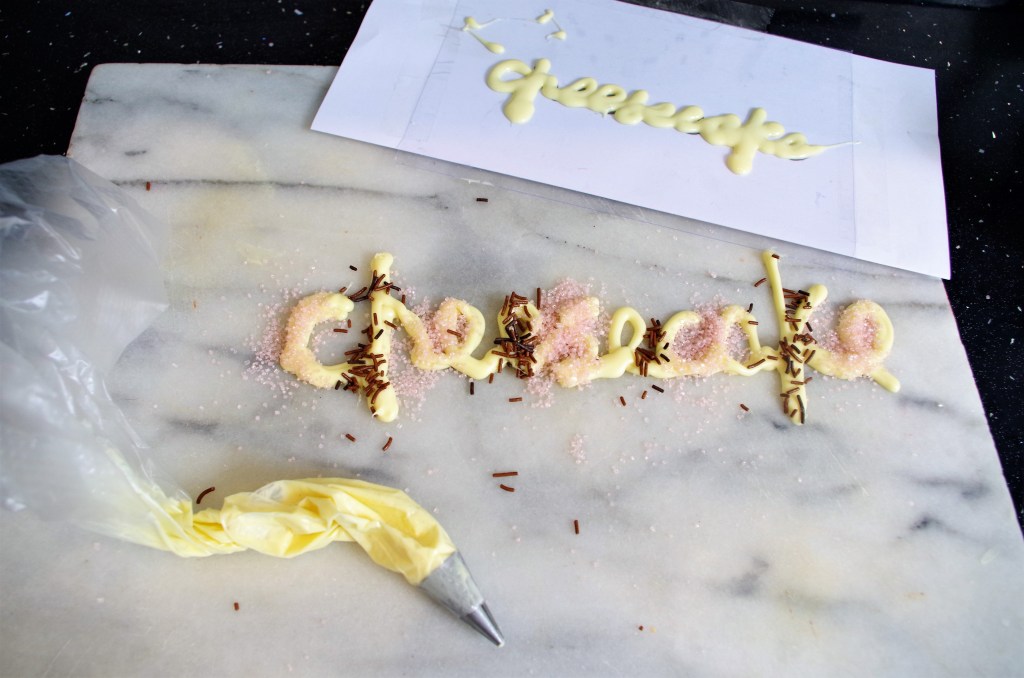
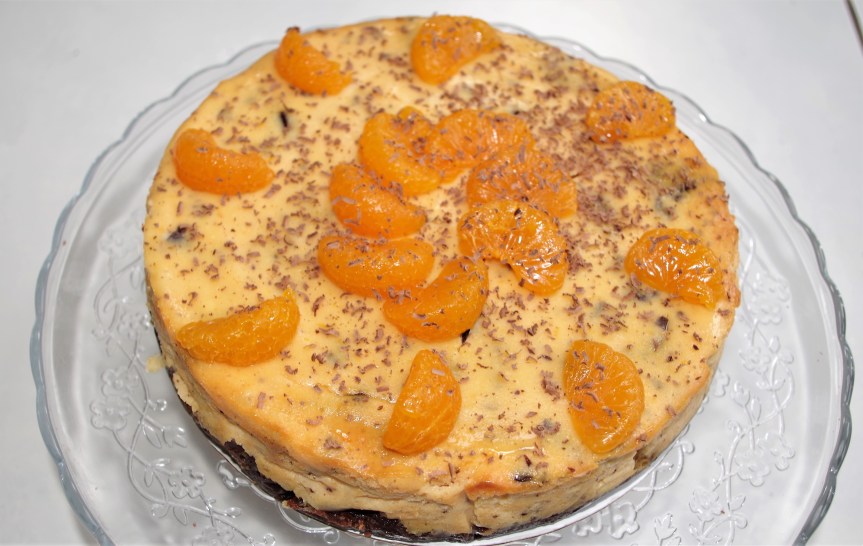
9. When it has fully set, release from the tin and decorate with shavings of white chocolate and/or strawberry slices before serving. I also piped some melted white chocolate onto acetate to create the word “Cheesecake”. (I’m still working on my piping skills.) Another option would be to pipe white and milk chocolate lines across the pink top.
Here are some galleries showing the process of making this cheesecake.
Gallery 1

Blind baking 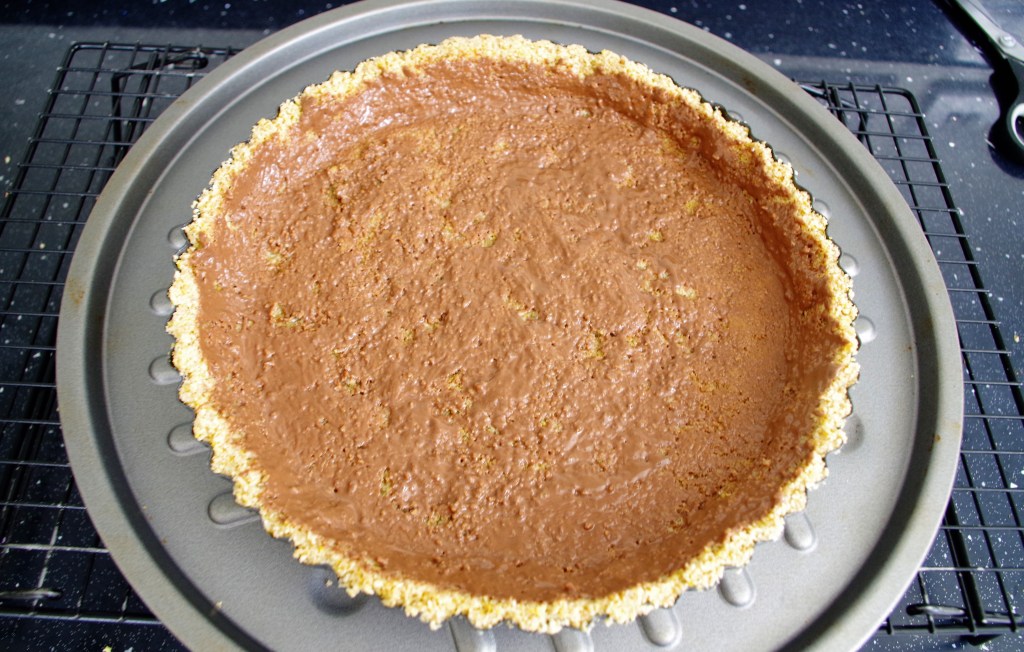
Brushed on chocolate coating 
Two mixtures
Gallery 2
Chocolate layer 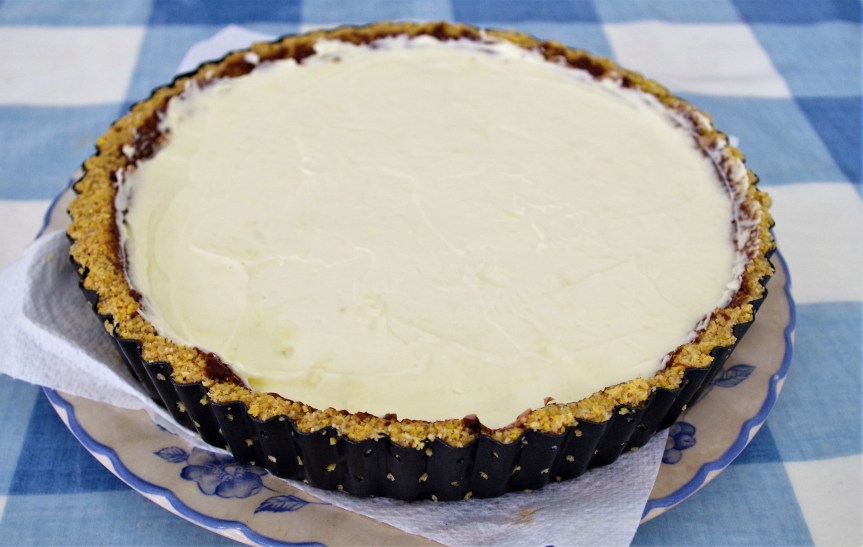
Vanilla layer 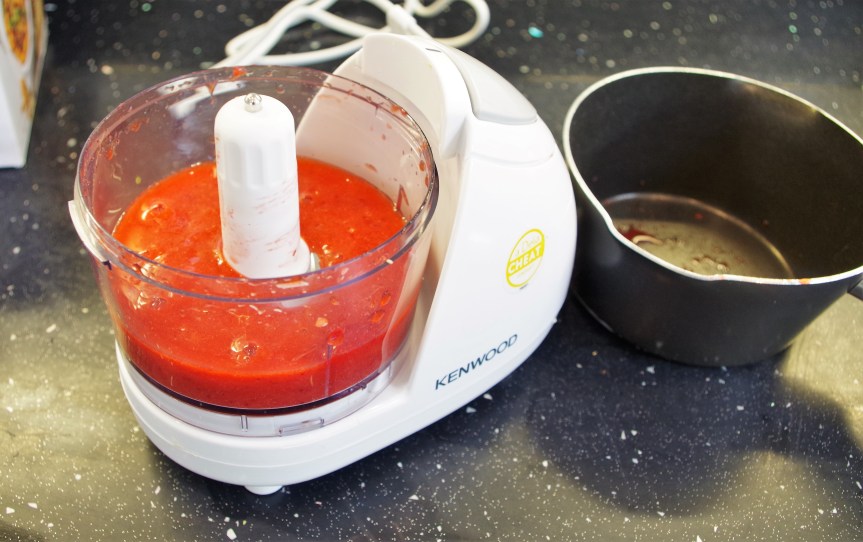
Strawberry puree
Gallery 3
Mixing the top (Strawberry) layer 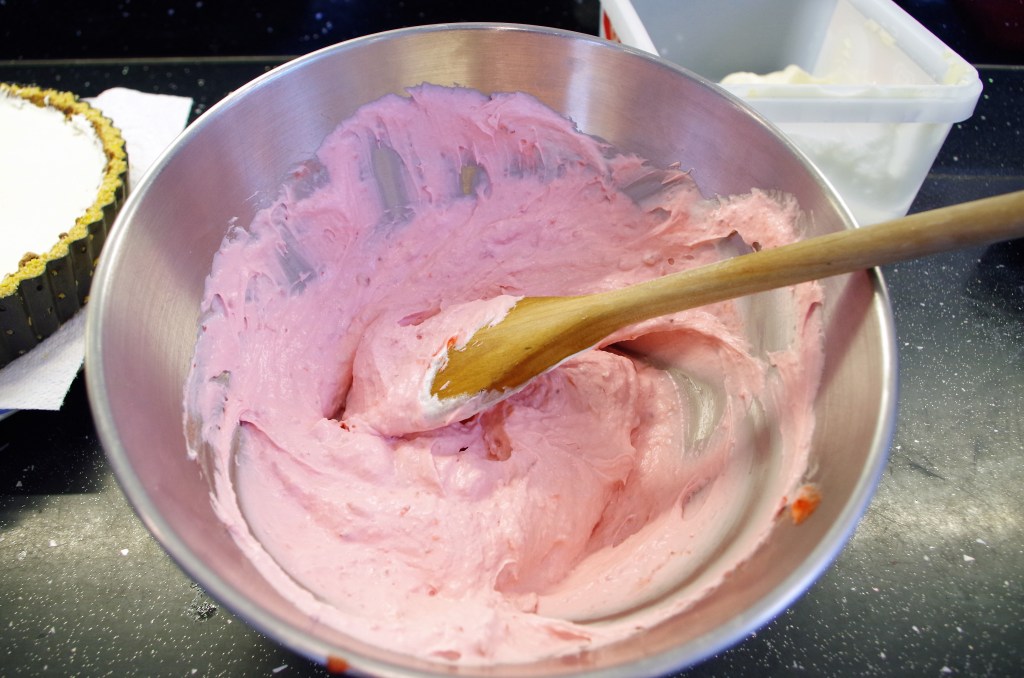
Top layer 
All three layers in
And here’s something that went wrong. I couldn’t release my decorated “Cheesecake” lettering from the marble slab without it breaking up. I had to use my smaller, practice, version. The lesson I leant was – use acetate.
I hope you enjoy this cheesecake. If you want to see more cheesecake recipes click here.
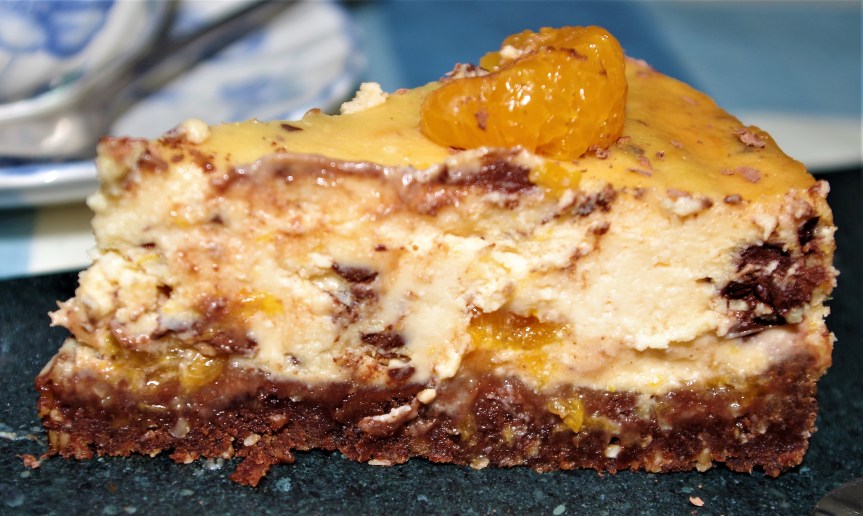
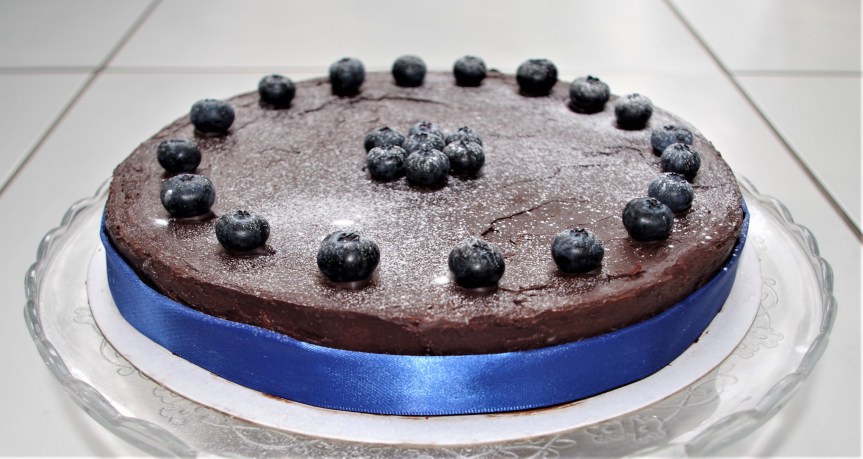
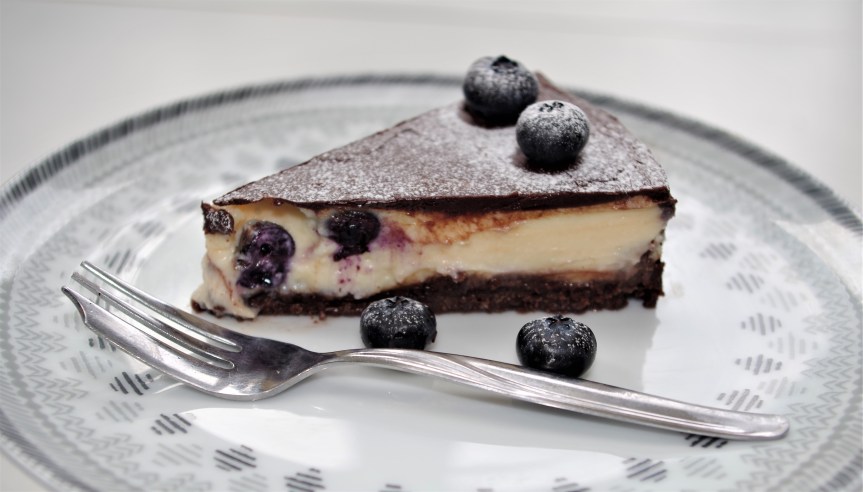
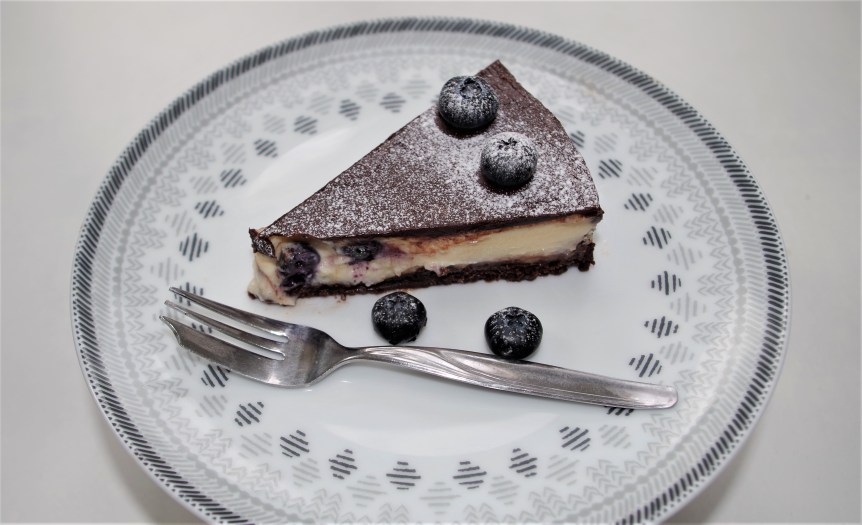
Two of my favourites that I’d love you to try are my Chocolate and Orange Cheesecake and my White Chocolate and Blueberry Cheesecake.

Please have a look at my site for lots of other recipes, sweet and savoury. If you’d like to comment or ask a question, that’s great. Just go to the contact page.

