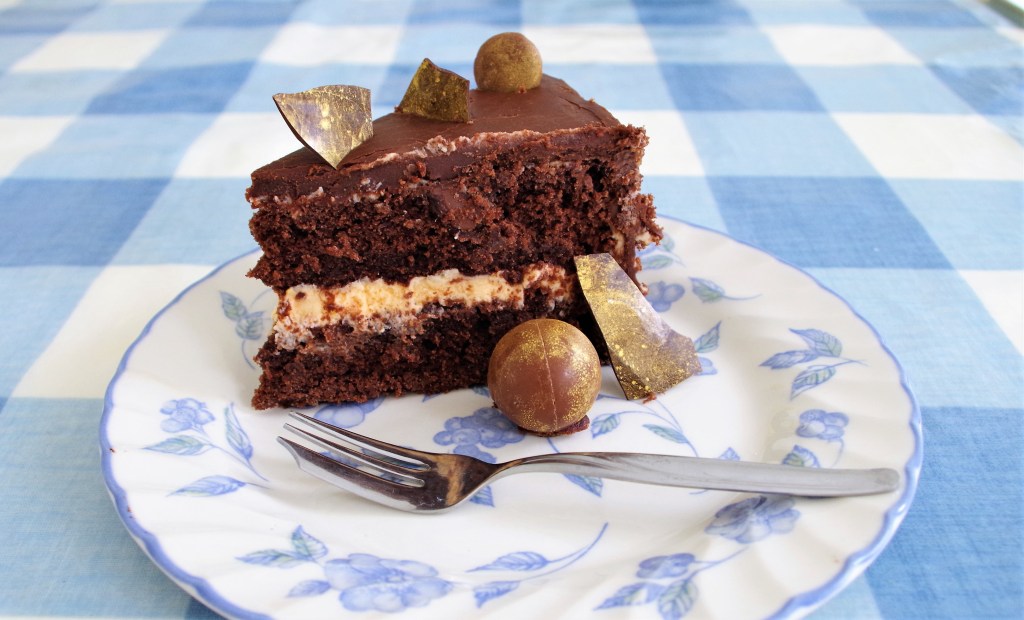
Here’s a stunning and sumptuous chocolate cake adorned with gold bling (tastefully, of course). The taste and texture are lovely too and more than live up to the show-stopping appearance. This version has a hint of orange, but that can be swapped for lemon, or coffee or whatever you fancy.

Serves: 12 – 15 slices
Time: Around 1 hr 40 min
Difficulty: A fairly easy cake, but decorations need a little thought
Need: 2 x 20cm/8” round, loose bottomed cake tins


Ingredients
Cake
- 185g/6½oz unsalted butter + a little to prep. the tins
- 225g/8oz plain flour
- 50g/1¾oz cocoa powder
- 2 tsp baking powder
- 3 eggs
- 150g/5½oz light muscovado sugar or light brown soft sugar
- 150g/5½oz golden caster sugar
- 1 tsp vanilla extract
- 200ml/7fl oz buttermilk
- 100g/3½oz chocolate chips or chunks
Filling (& crumb coating)
- 100g/3½oz white chocolate
- 250g/9oz mascarpone or full fat cream cheese
- 60g/2oz icing sugar, sieved
- 1 tsp vanilla extract and
- 1 tsp orange extract (optional)
- Zest from half an Orange
- Orange food colouring (optional)
Chocolate Coating
- 150g/5½oz dark chocolate, chopped
- 150ml/5½fl oz double cream
- 30g/1oz unsalted butter
- 3 tbsp golden caster sugar
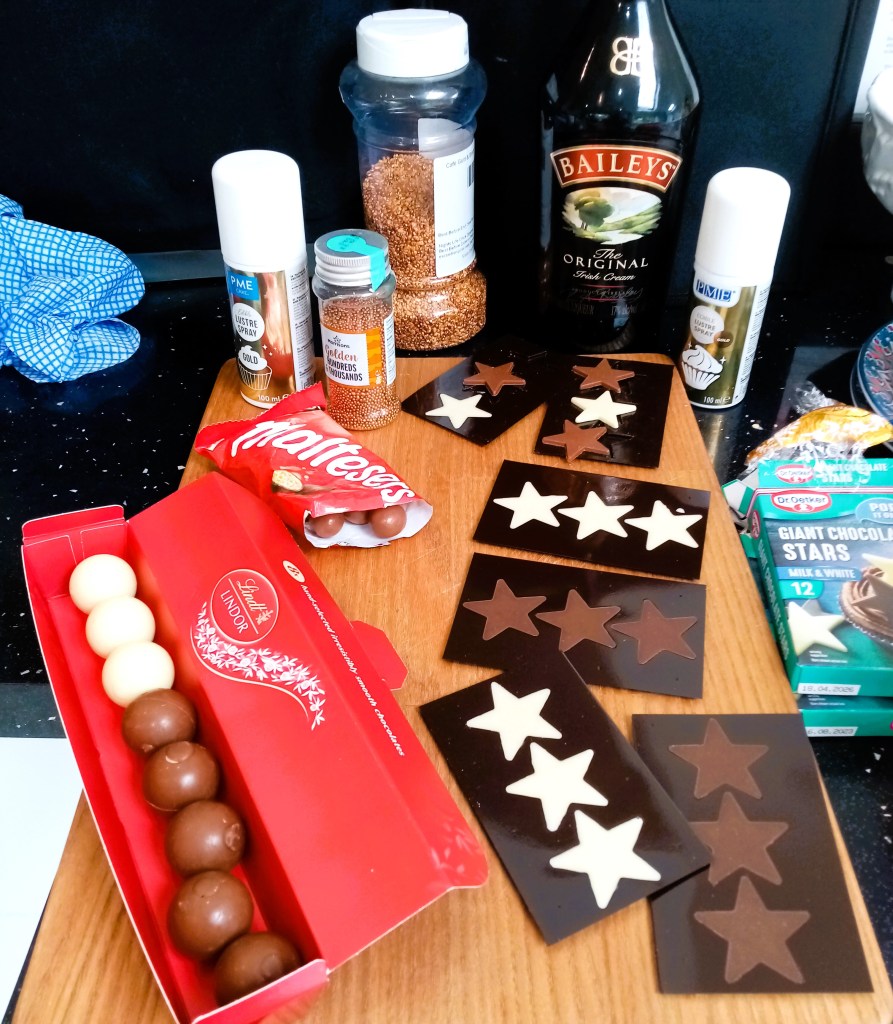
- Your choice of chocolates for decoration (see below for ideas)
Pre-bake preparation
- Weigh and soften the butter
- Sift together the flour, cocoa powder and baking powder
- Butter the two cake tins and line the base, dust very lightly with cocoa powder
- Lightly mix the eggs in a small bowl
- Pre-heat the oven to 180°C / fan 160°C / 350°F / Gas 4
Method
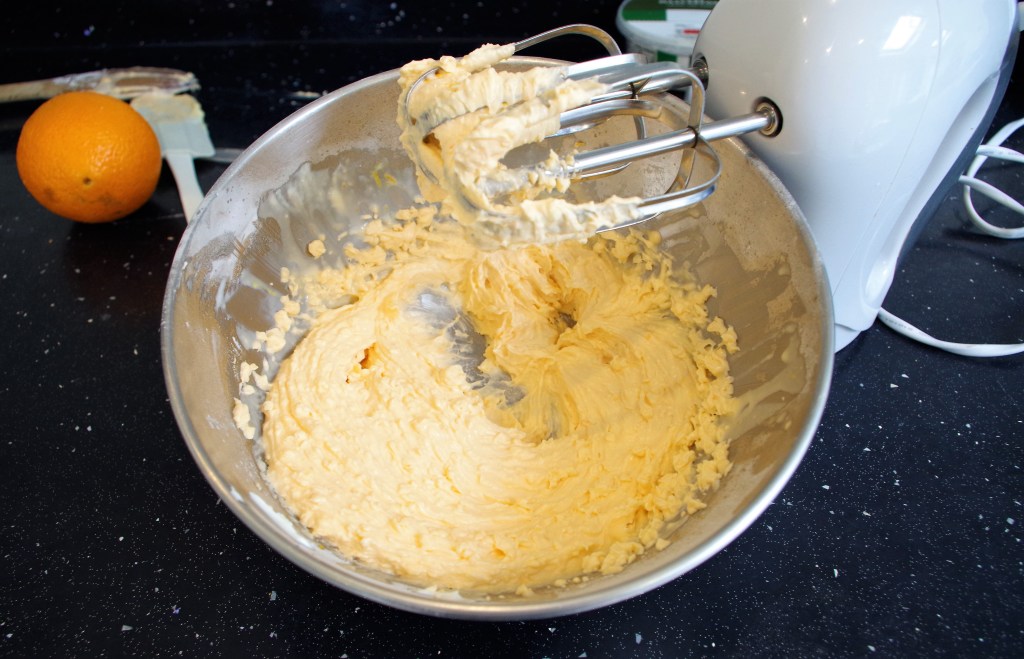
1. Put the softened butter, both sugars and the vanilla extract into a large bowl and beat together until the mixture is light and fluffy.
2. Gradually add the eggs, beating well between each addition. Add 1 tsp of the flour mixture each time.
3. Add a third of the flour, cocoa powder & baking powder mixture and a third of the buttermilk, gently combining them. Repeat twice then stir in the chocolate chips.
4. Spoon the mixture equally between the prepared tins. (Weigh for accuracy) Tap the tins on a worksurface a couple of times to settle the mixture then level the surface.
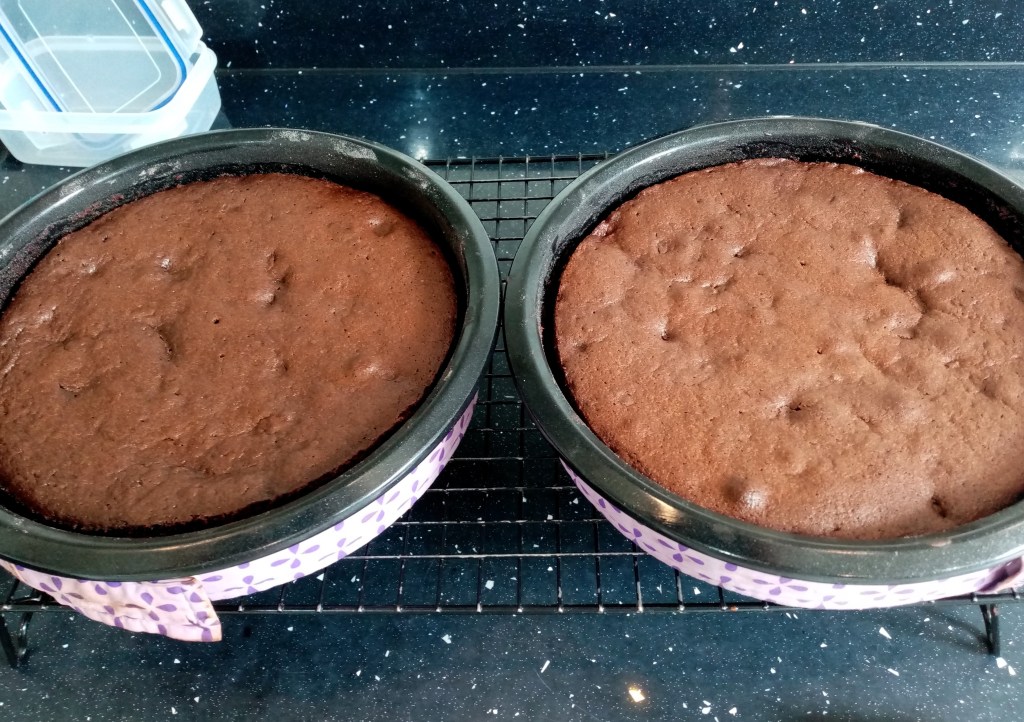
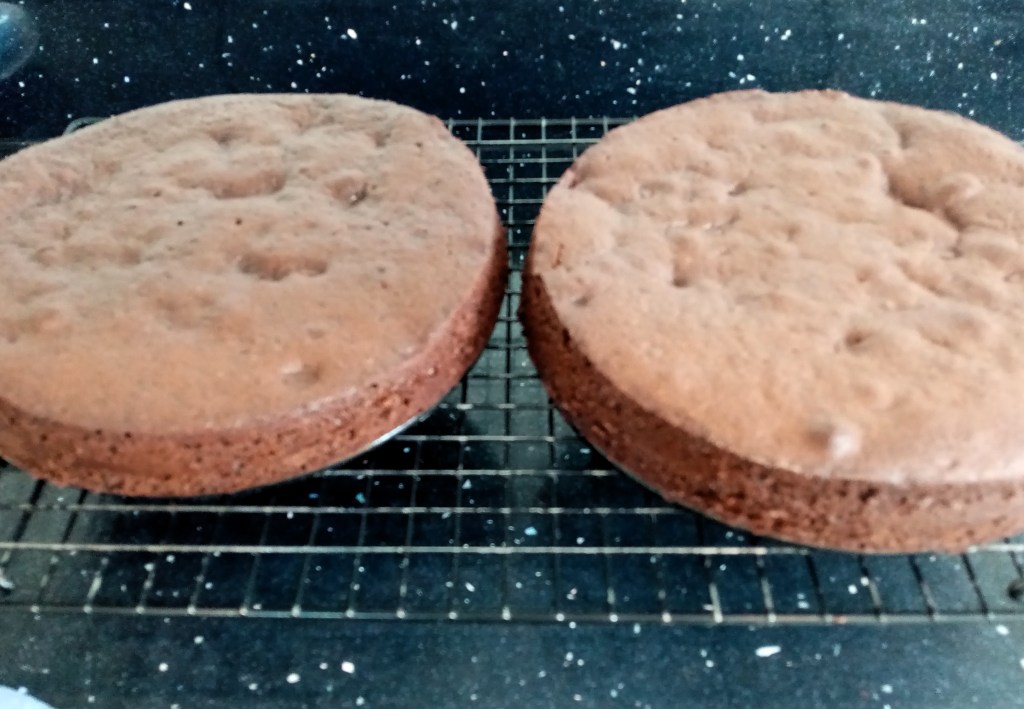
5. Bake for 30 – 40 minutes – until the sides of the cakes begin to pull away from the tins or when a skewer comes out clean.
6. Cool in the tins for 5 – 10 minutes then turn out onto a wire rack to cool fully.
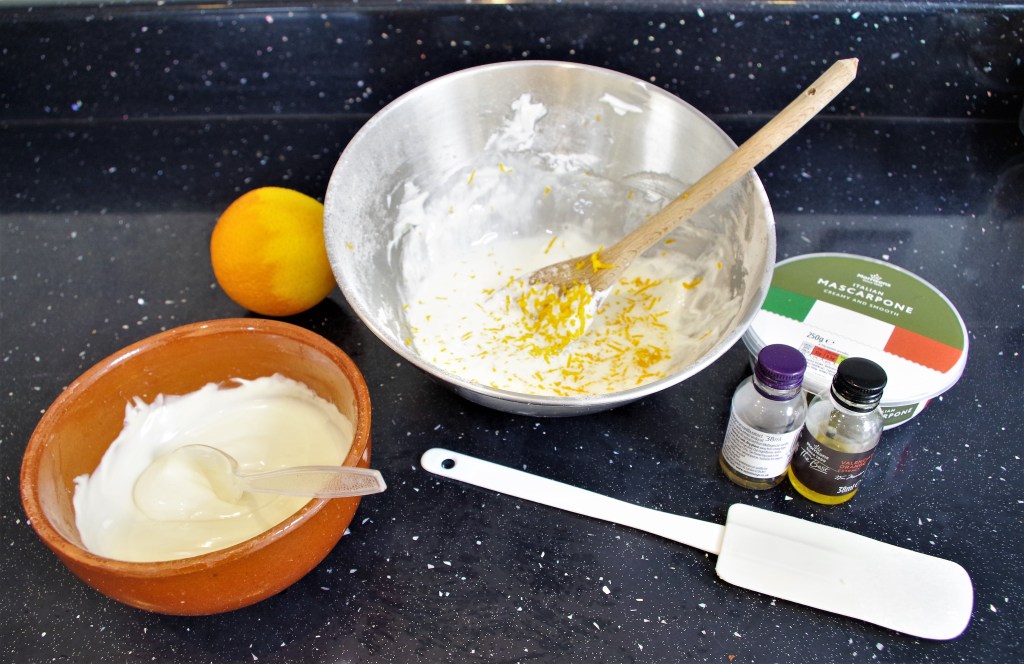
7. To make the filling, first melt the white chocolate, either in a bain marie or carefully in a micro wave, stirring regularly. Set aside to cool.
8. Stir then beat together the mascarpone, icing sugar, vanilla & orange extracts and orange zest. Beat in the cooled chocolate. Mix in orange food colouring if using. Beat until smooth and firm.
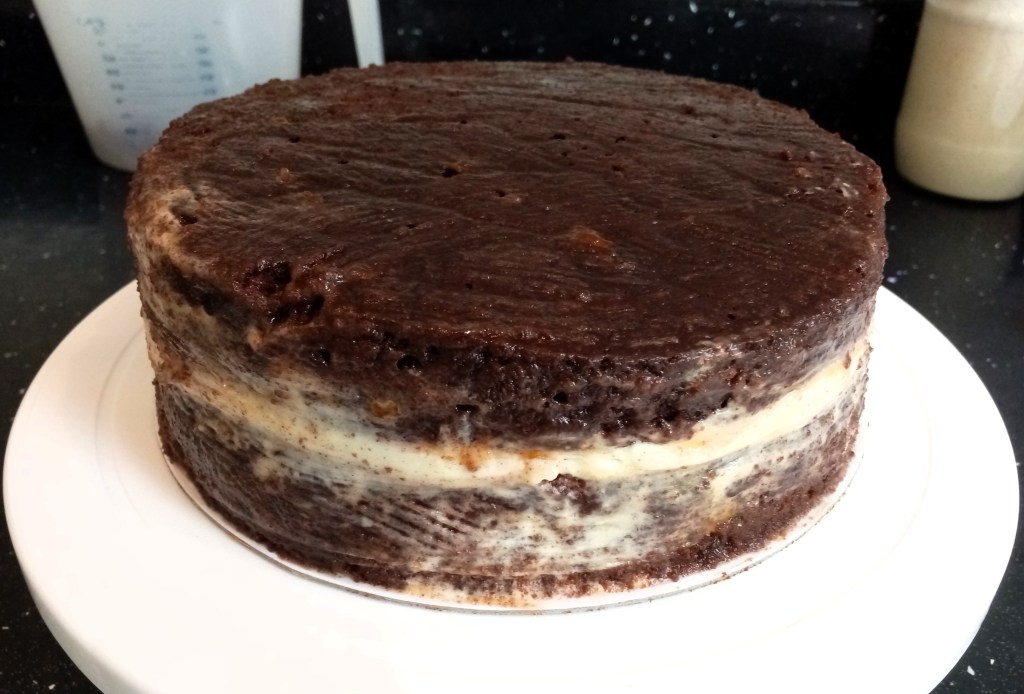
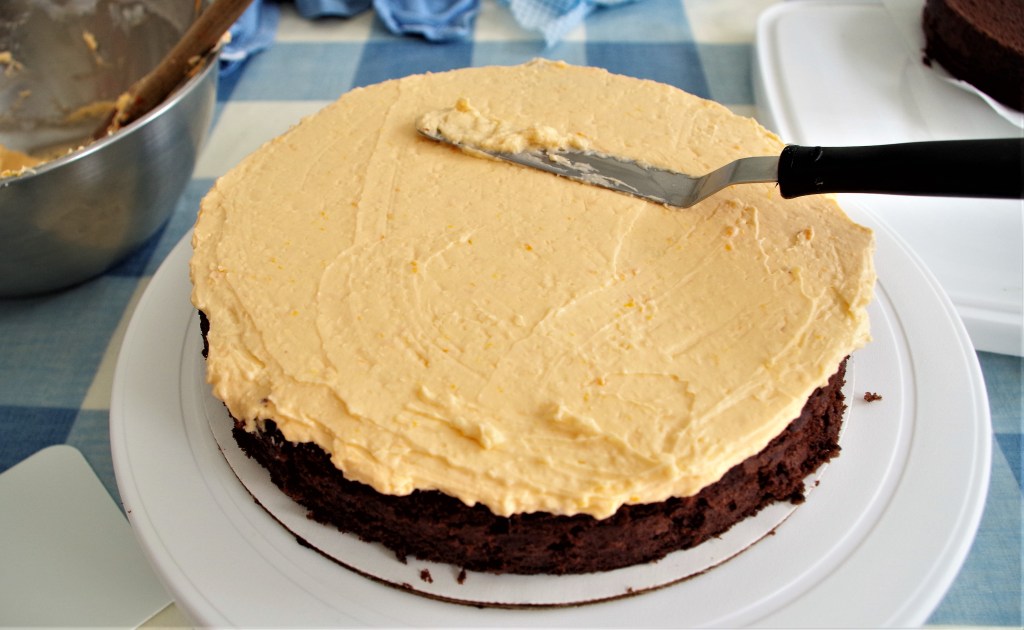
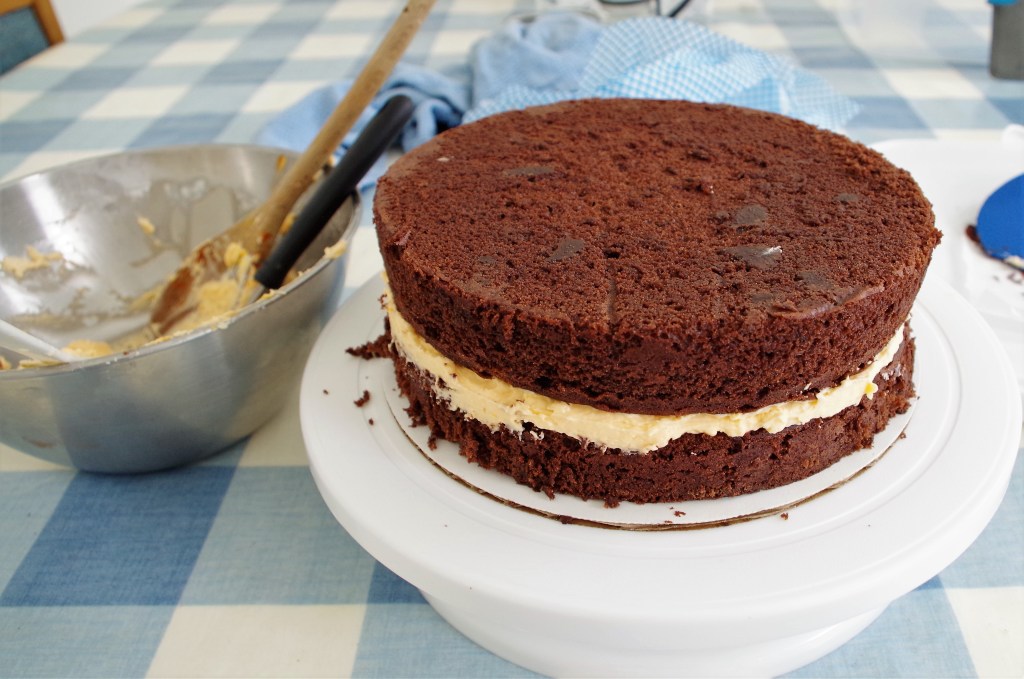
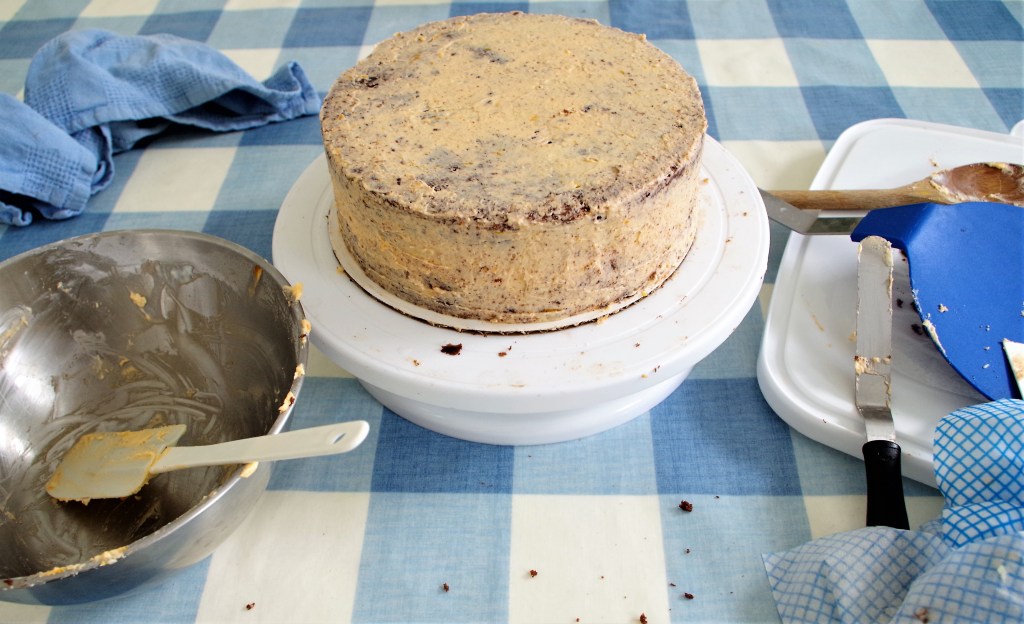
9. On a board or turntable, combine the two cakes, using about half of the filling between them. (Apply with a spatula or a piping bag with a large plain nozzle.) Use the remaining mixture to crumb coat the cake. Place in fridge for 30 minutes to firm up.
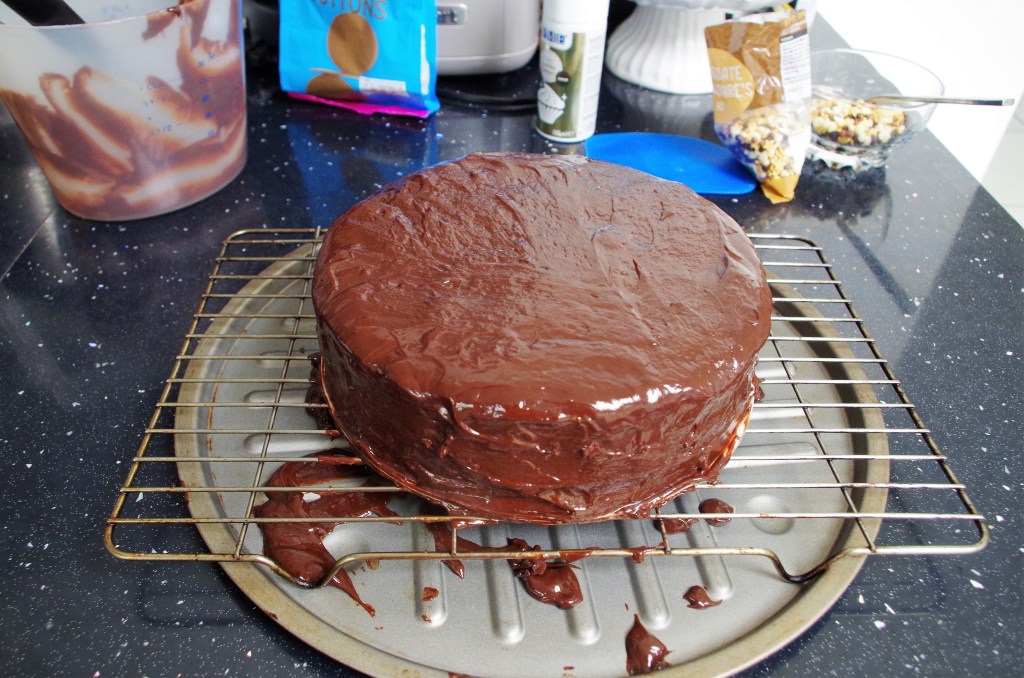
10. Meanwhile, make the ganache. Place the chocolate in a suitable dish then heat the cream with the sugar and butter to almost boiling. Take off the heat and allow it to cool slightly then pour over the chocolate pieces. Wait a few minutes before stirring to combine. Stir until smooth then leave to cool and thicken a little.
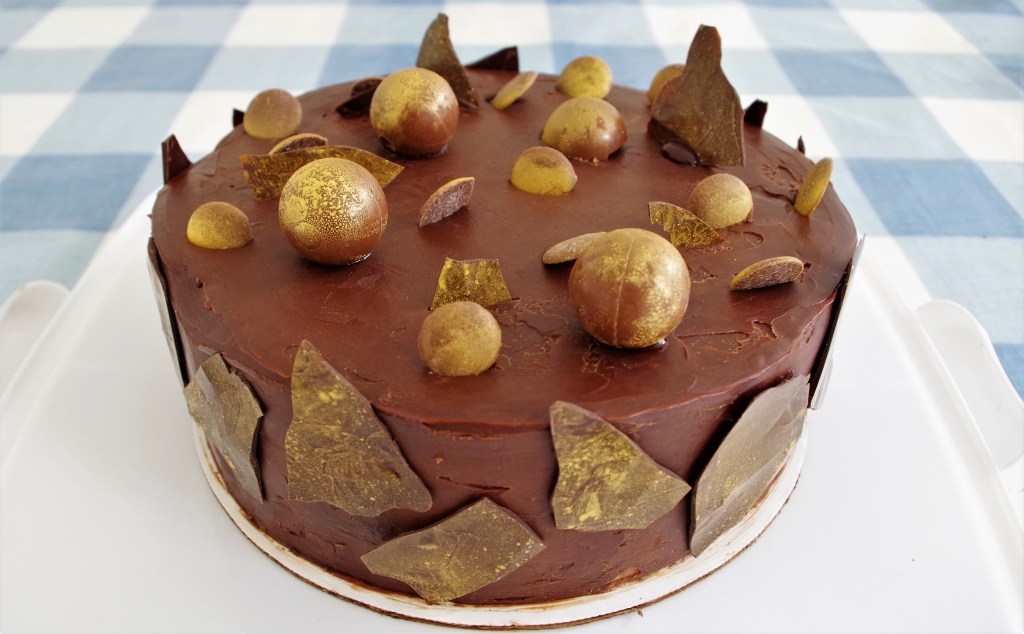
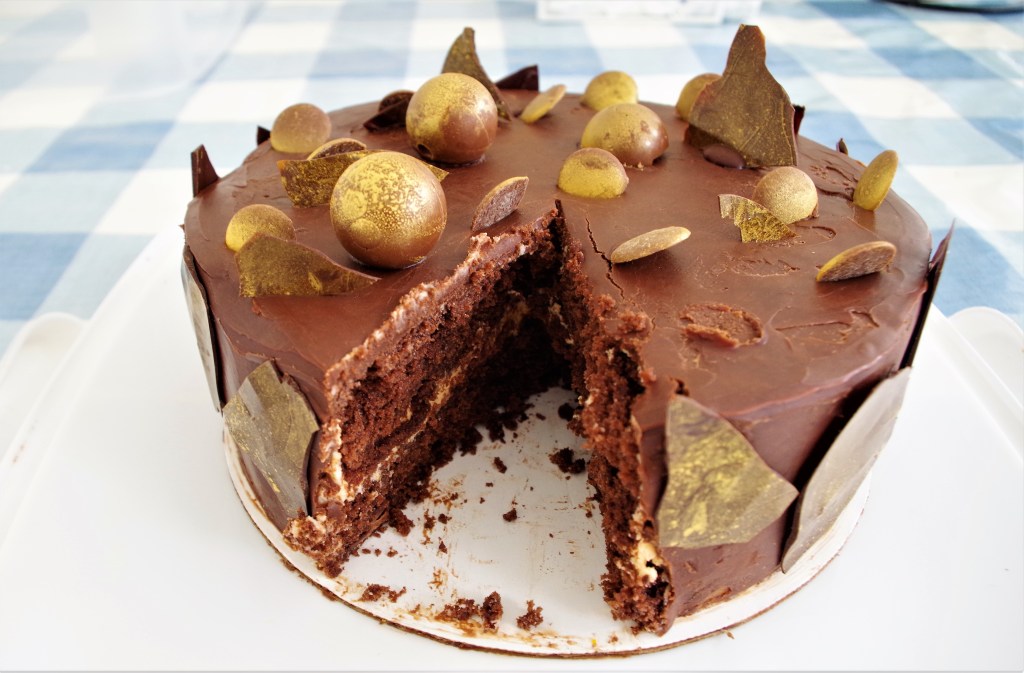
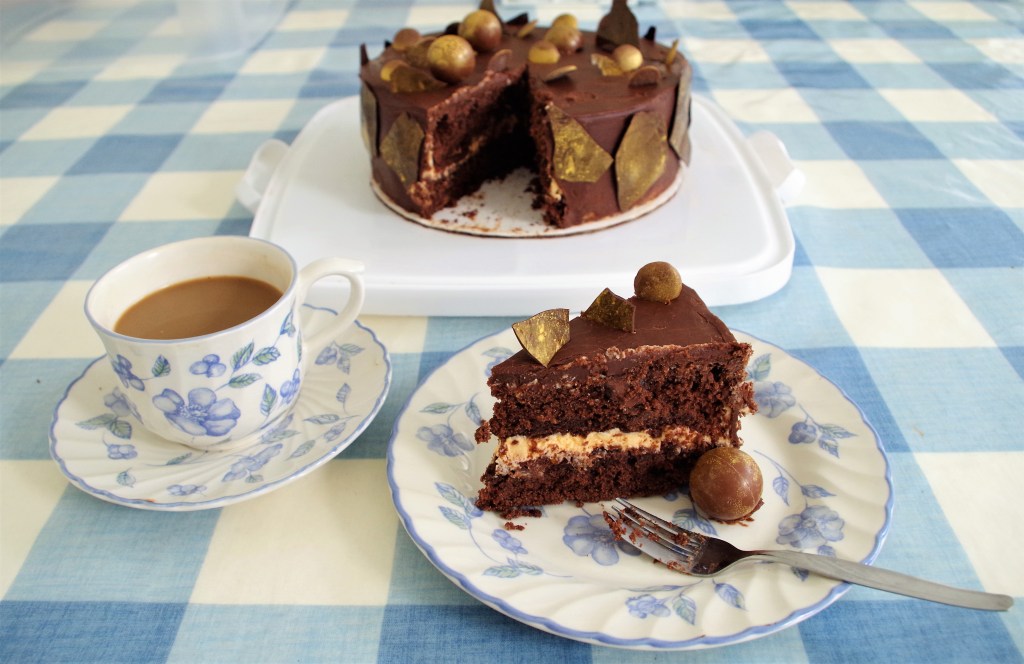
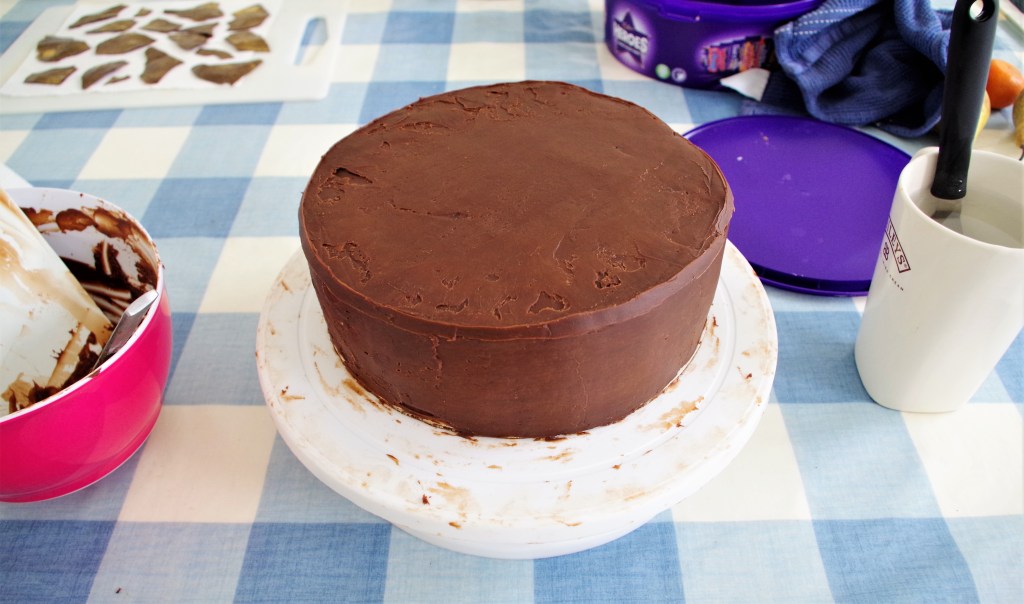
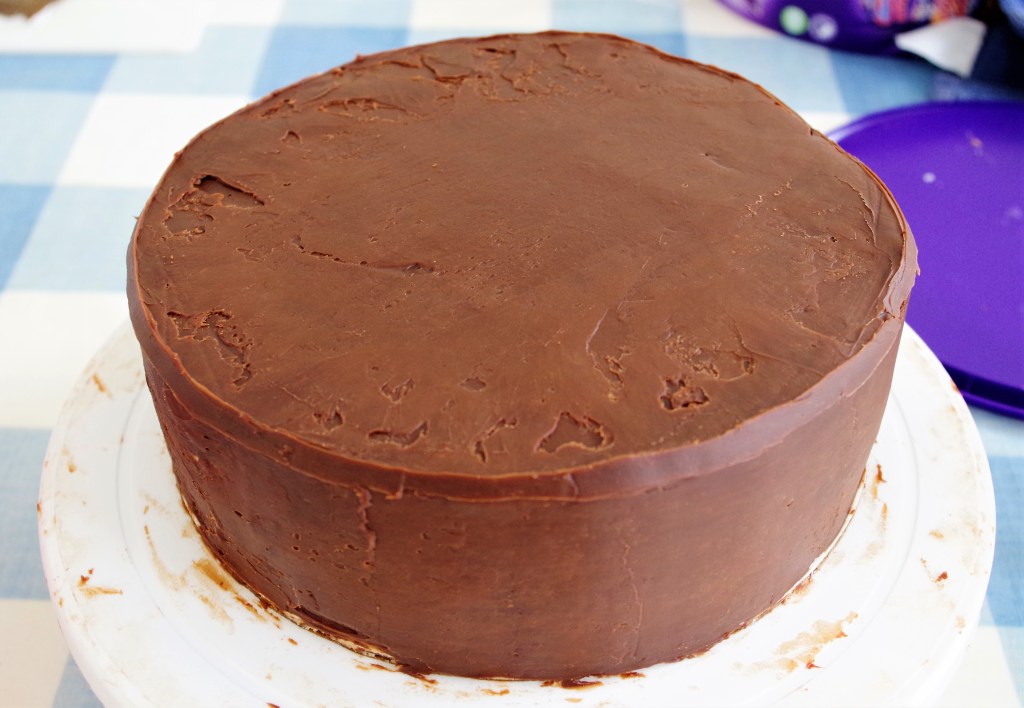
11. Coat the top and sides of the chilled cake with the ganache. Arrange the decorations on the top and sides.
Ideas for decorating your cake
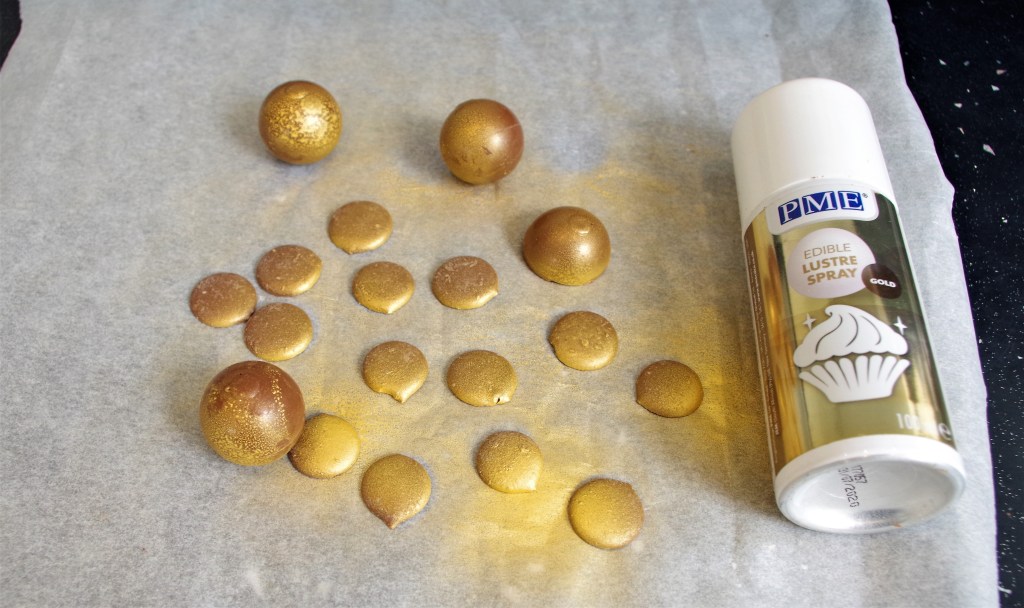
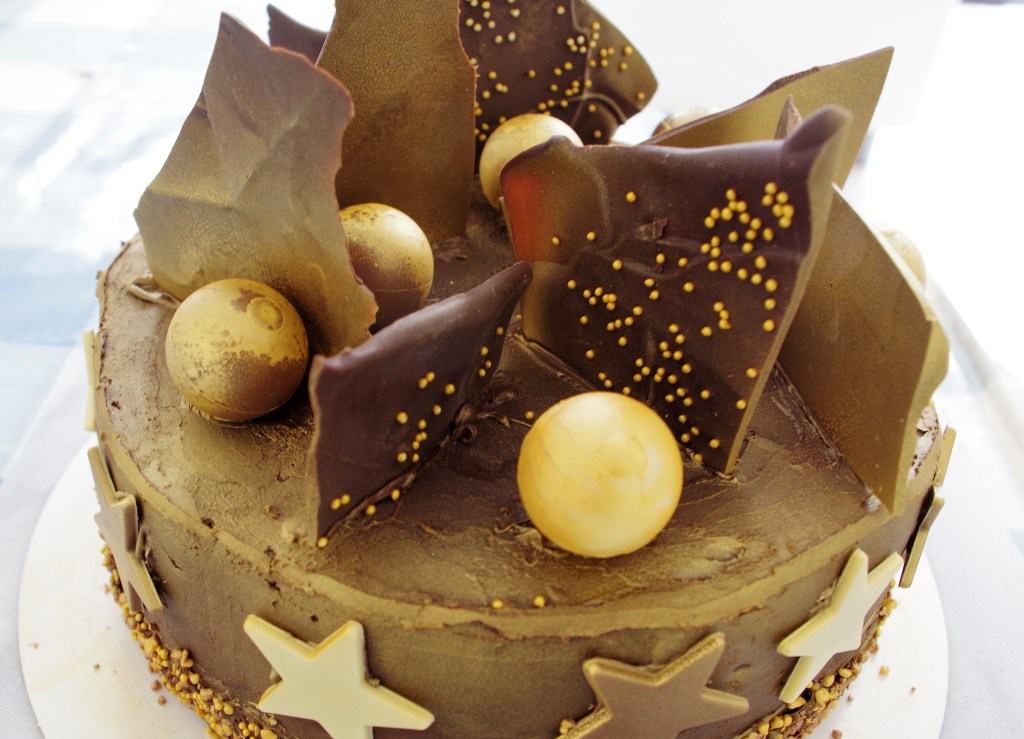
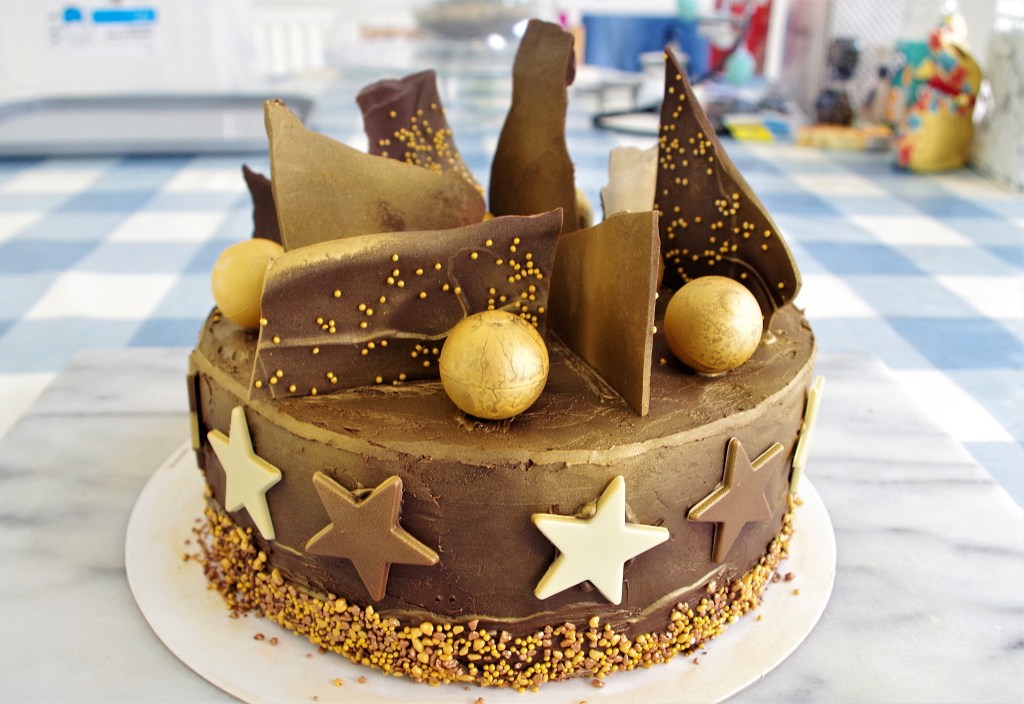
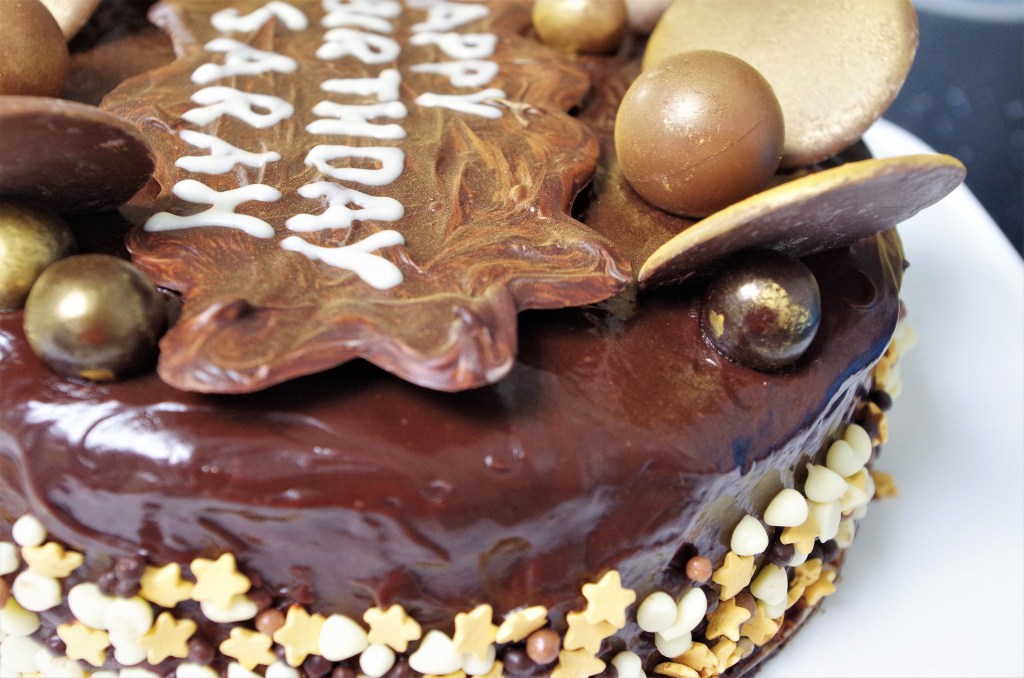
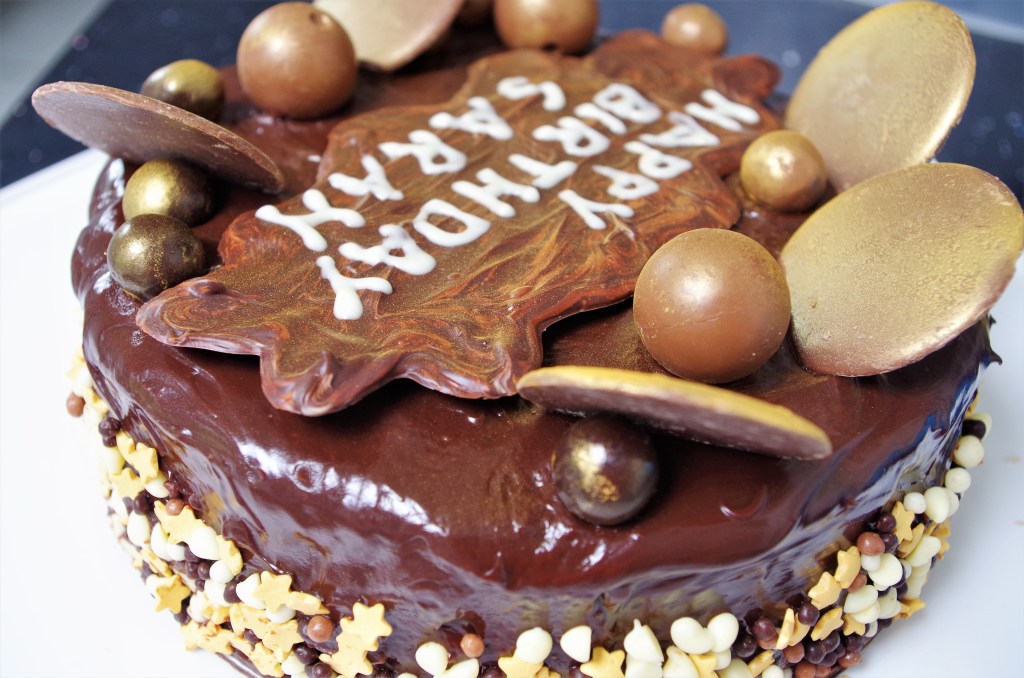
i) Use Lindor chocolate balls, either as they are or spray with gold lustre. (Maybe use dark, milk and white balls) Large and small chocolate buttons can also look good, especially when sprayed with gold.
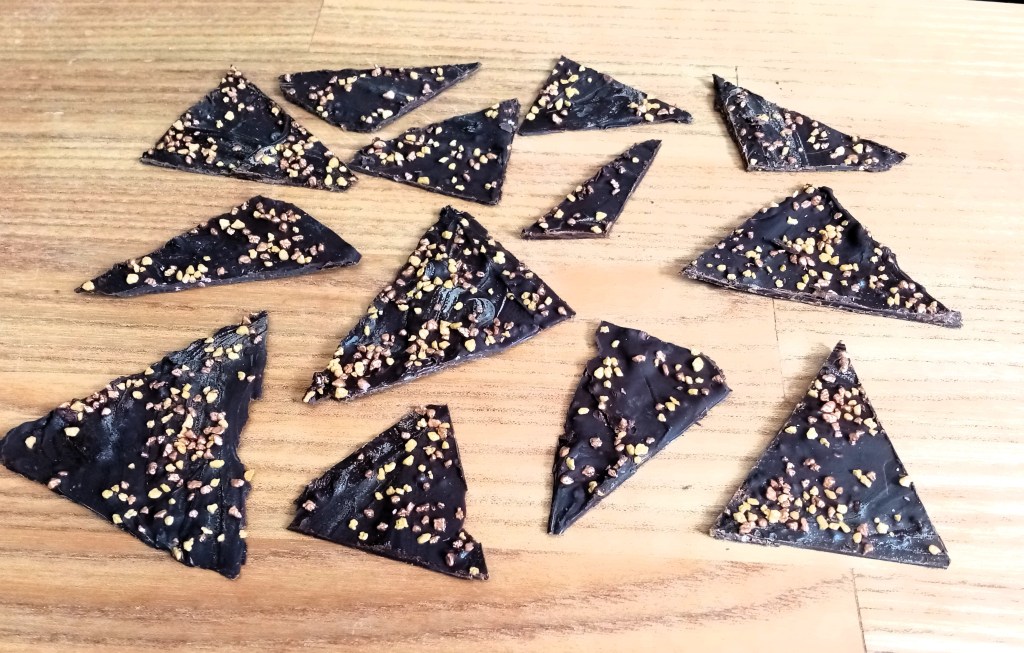
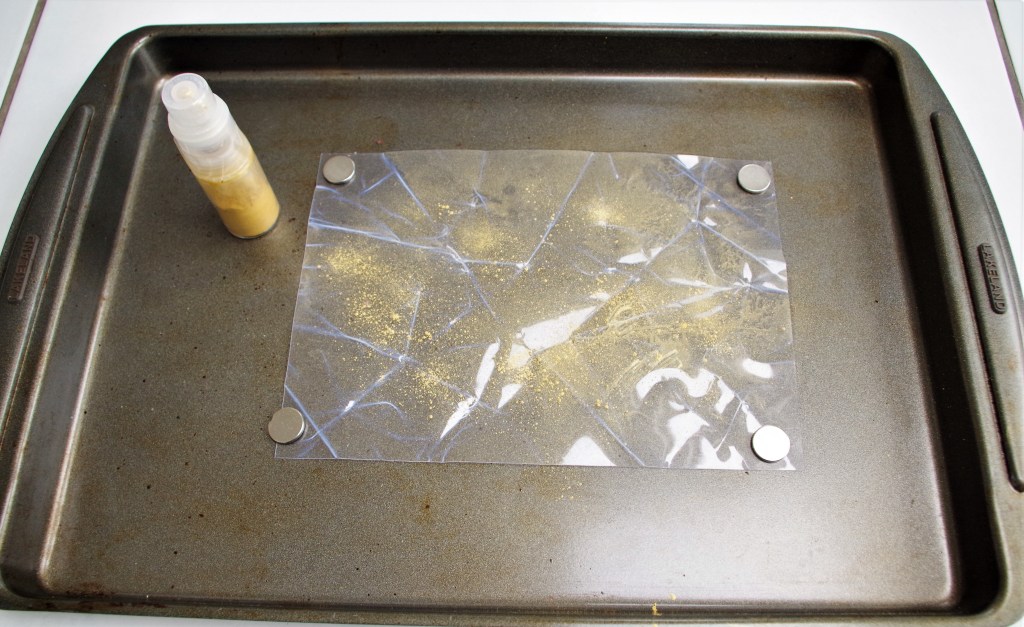
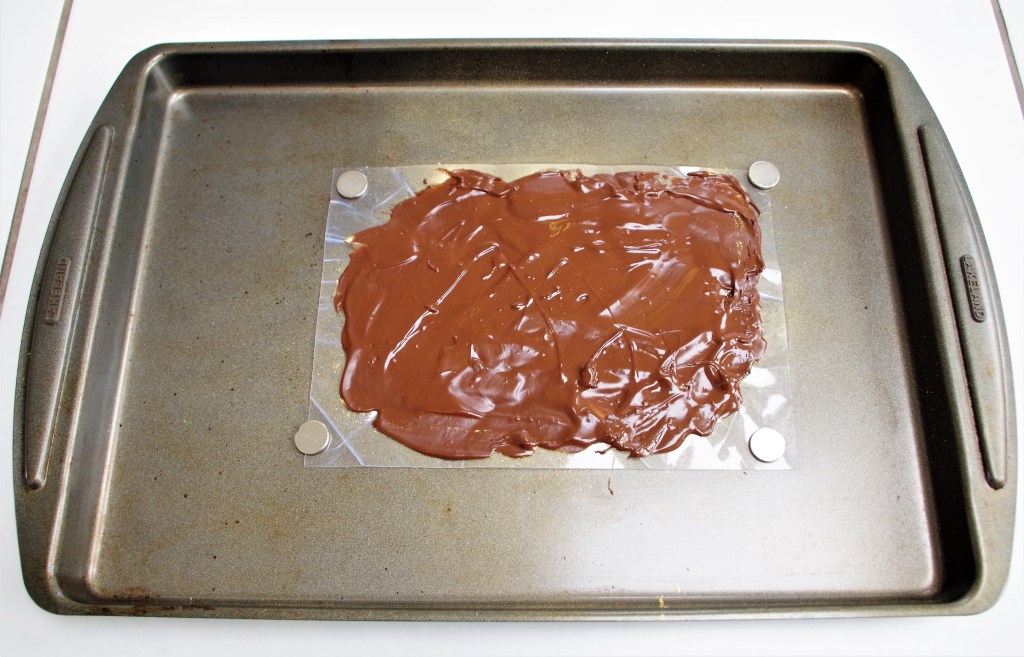
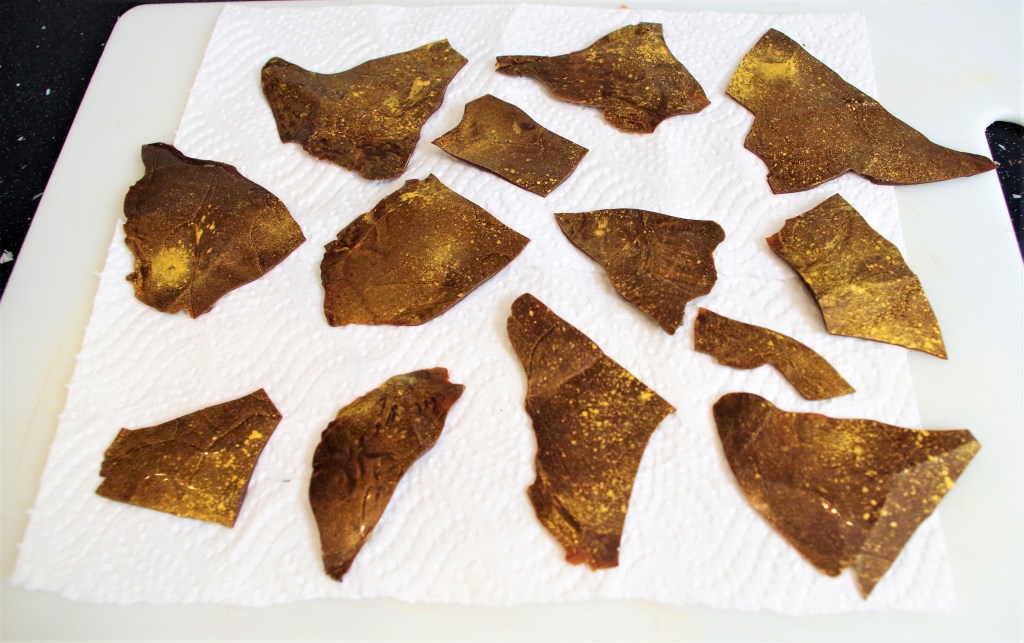
ii) Brush or spray some edible gold or orange powder onto a clear acetate sheet. Pour on melted chocolate and smooth it over the surface. Leave it to set then break into shards. These can either go on top of the cake or round the bottom edge. The acetate sheet can be left flat, but I like to scrumple it to create texture (see gallery 2, below).
iii) Melt some white and also a smaller amount of dark or milk chocolate then pour most of the white onto a sheet of acetate and level it. Add some orange food colour to the remaining white chocolate the blob this onto the white. Likewise, blob on some dark or milk chocolate. Use a cocktail stick to create a swirly effect. As this begins to set, stamp out shapes using a metal cutter, or allow it to set then break into random shards.
Gallery 1 – Basic cakes + Filling prep

Gallery 2 – Gold chocolate shards

Gallery 3 – Crumb coating

Gallery 4 – Gold decorations and ganached cake
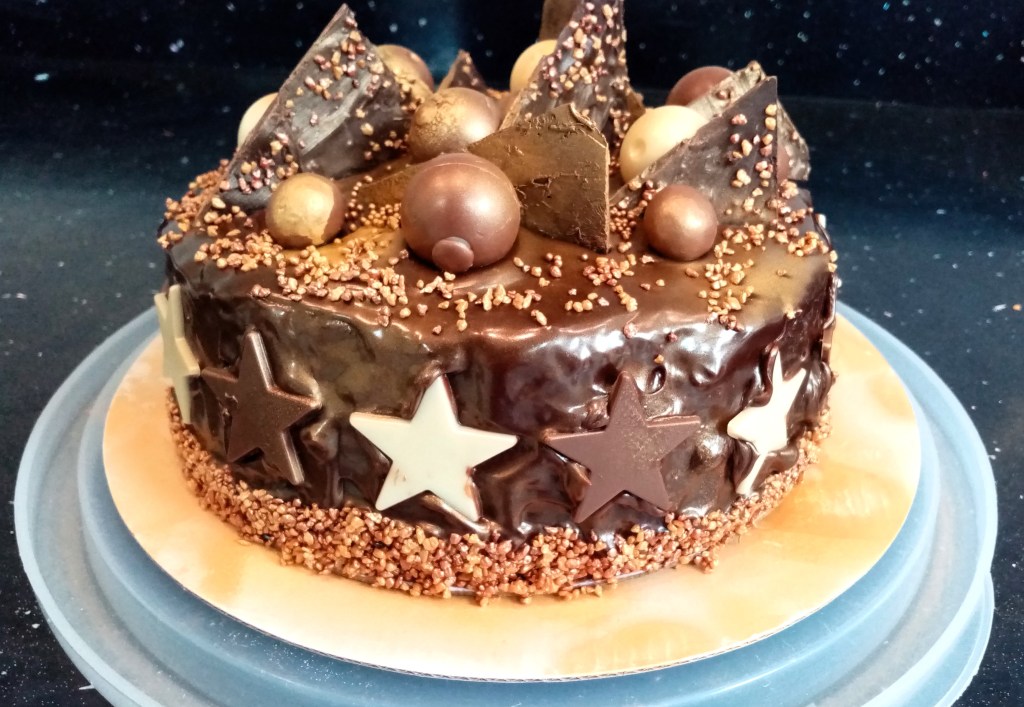
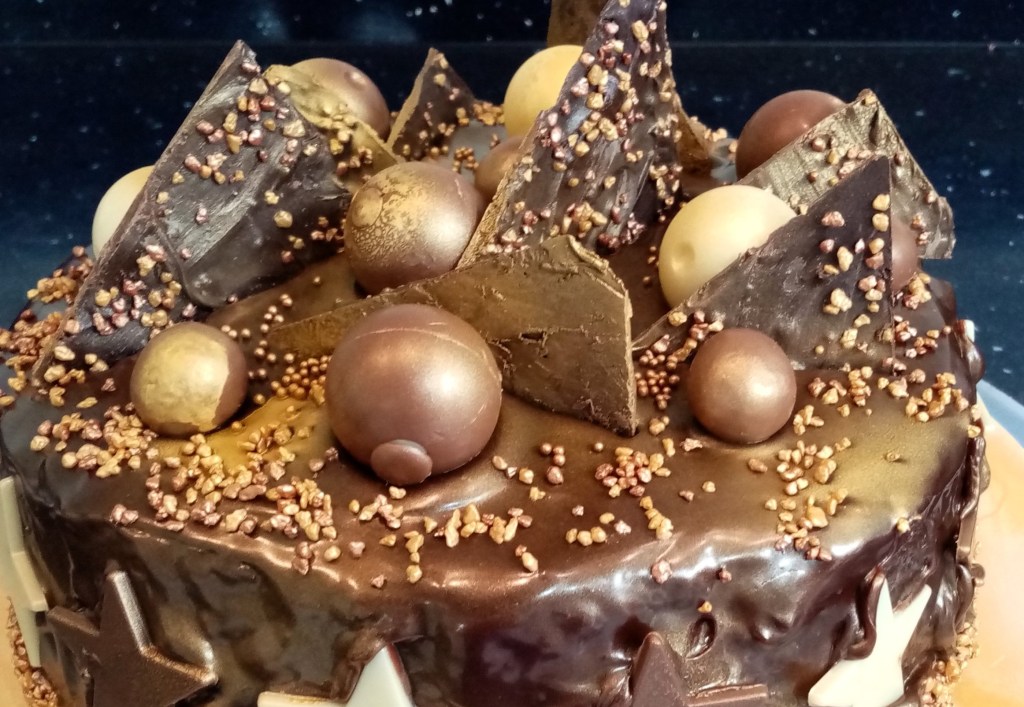
Gallery 5 – This gallery shows another, similar, decorating option. I added gold sprinkles to the bottom part of the cake, having first brushed the area with melted chocolate. I alternated dark and white chocolate stars around the cake, again using brushed on melted chocolate. The topping consists of gold sprayed dark and white Lindor chocolate balls plus shards that I “made earlier”. First I sprayed a couple of acetate sheets with PME Gold lustre, poured on the chocolate, then added some gold sprinkles. All very easy, mainly using shop bought items, but a spectacular result.


I hope you enjoy this lovely cake. If you want to see more chocolate cake recipes click here. Or have a look at my site for lots of other recipes, sweet and savoury.
If you’d like to comment or ask a question please do, via the contact page.
LATEST VERSION

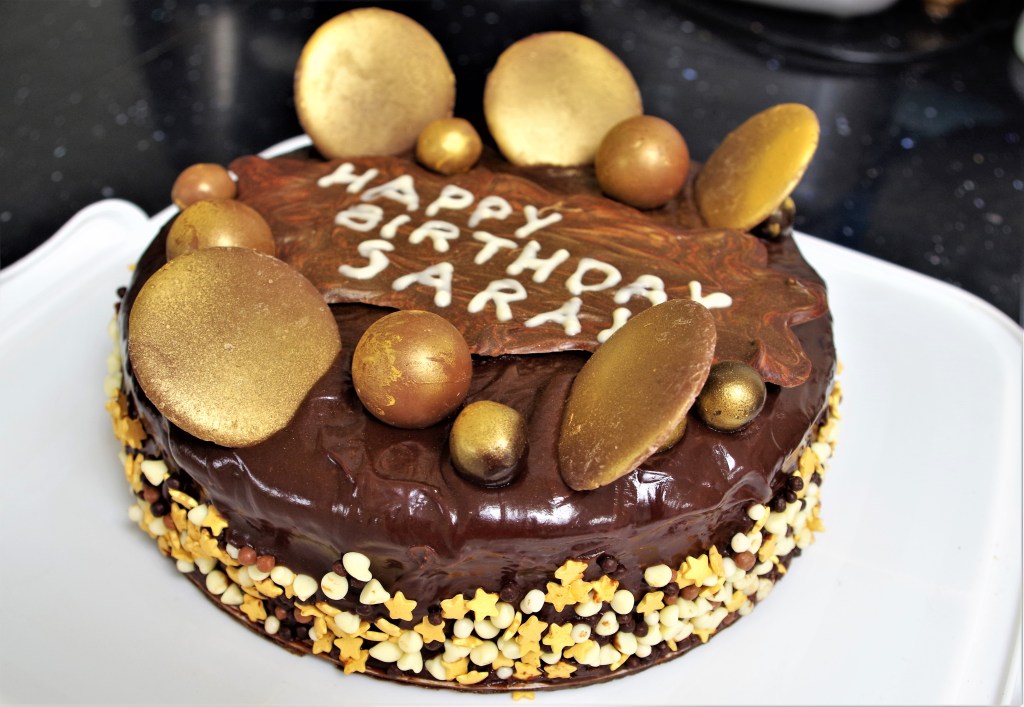
A friend recently asked me to make a birthday cake for his wife. He knew she liked chocolate and vanilla, so I adapted my Golden Chocolate cake. I left out the orange and increased the vanilla a little. Just to give some balance I added a layer of lemon curd before the rich white chocolate buttercream layer when assembling the cake. The feedback was very positive. I also decorated it differently and here’s how:
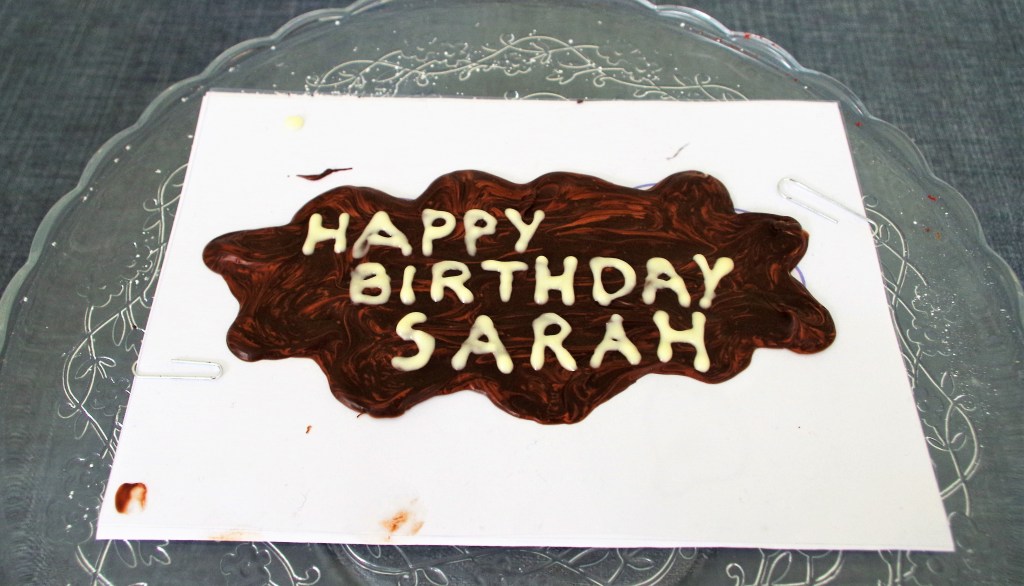
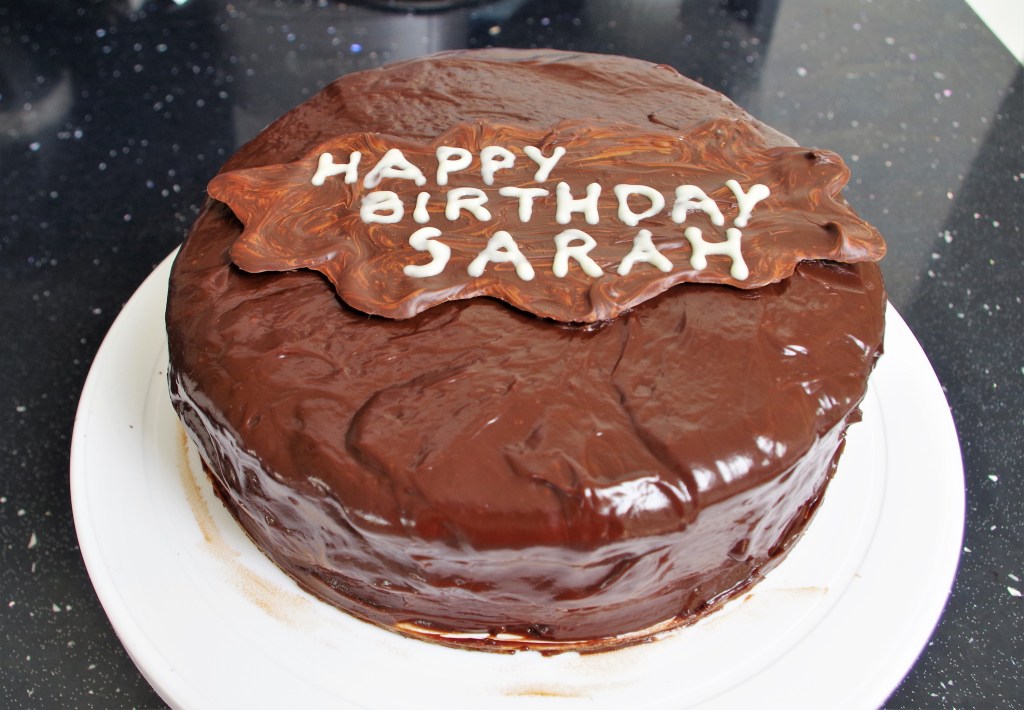
As you see, I create a chocolate “plaque” because I can wipe it clean and start again if necessary.


Overall, everyone was happy with it, including Sarah. (Phew!)
And, once again, another “latest” version
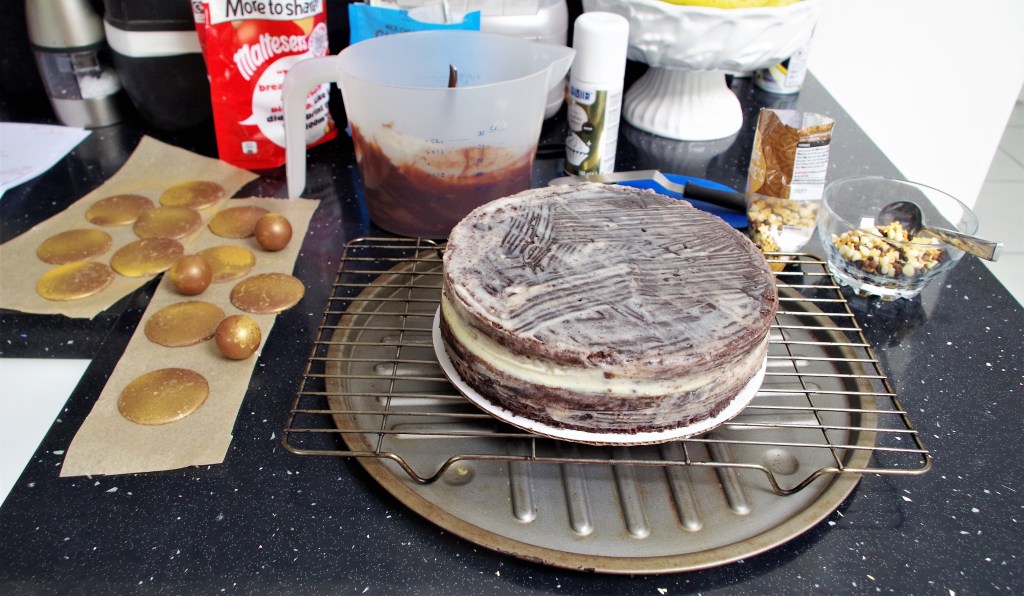
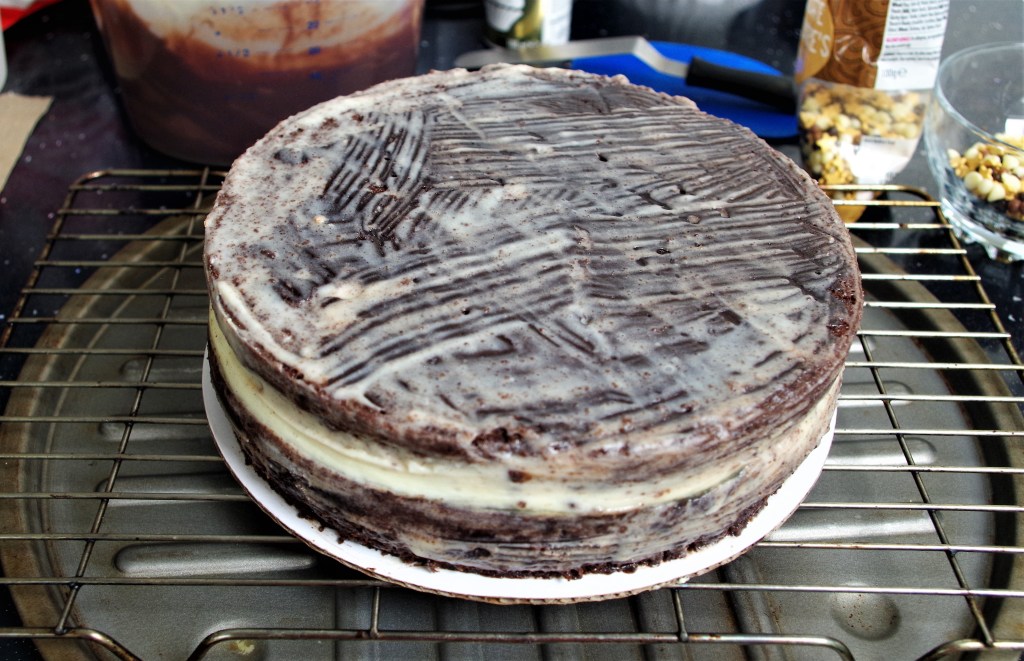
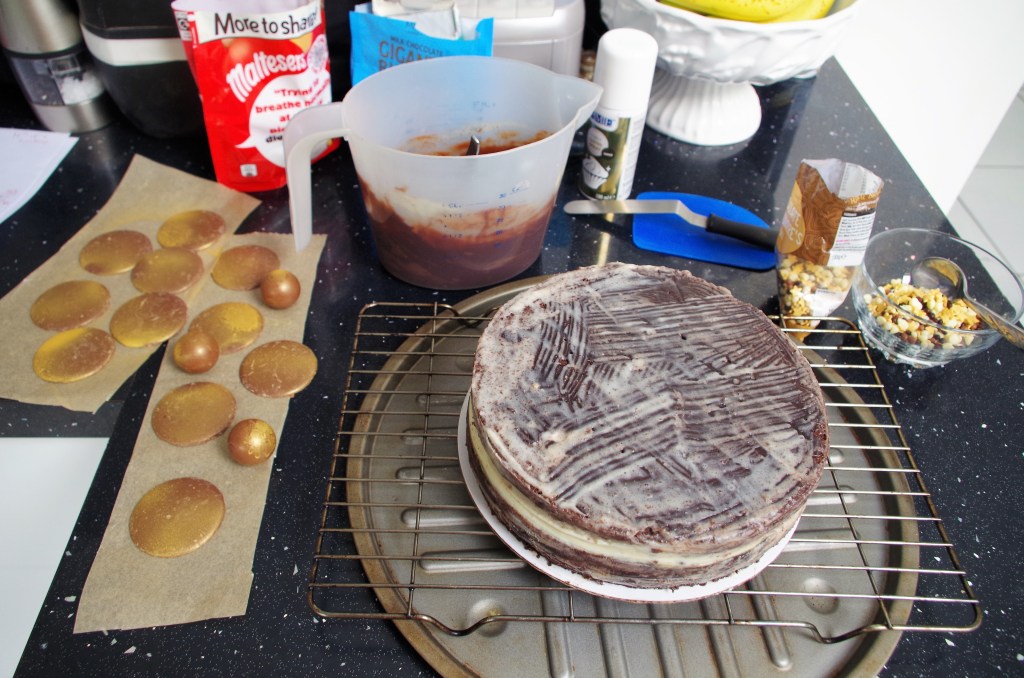
This just goes to prove that when you create something that looks and tastes great it’s worth making again and again, especially when the requests come in. This time it was for a friend’s son’s birthday. I made this one without adding any orange, because I realised that I either had to put in a lot more or none at all. And went for the latter. It was fine. Below are four galleries to show the process, but finished cake first: