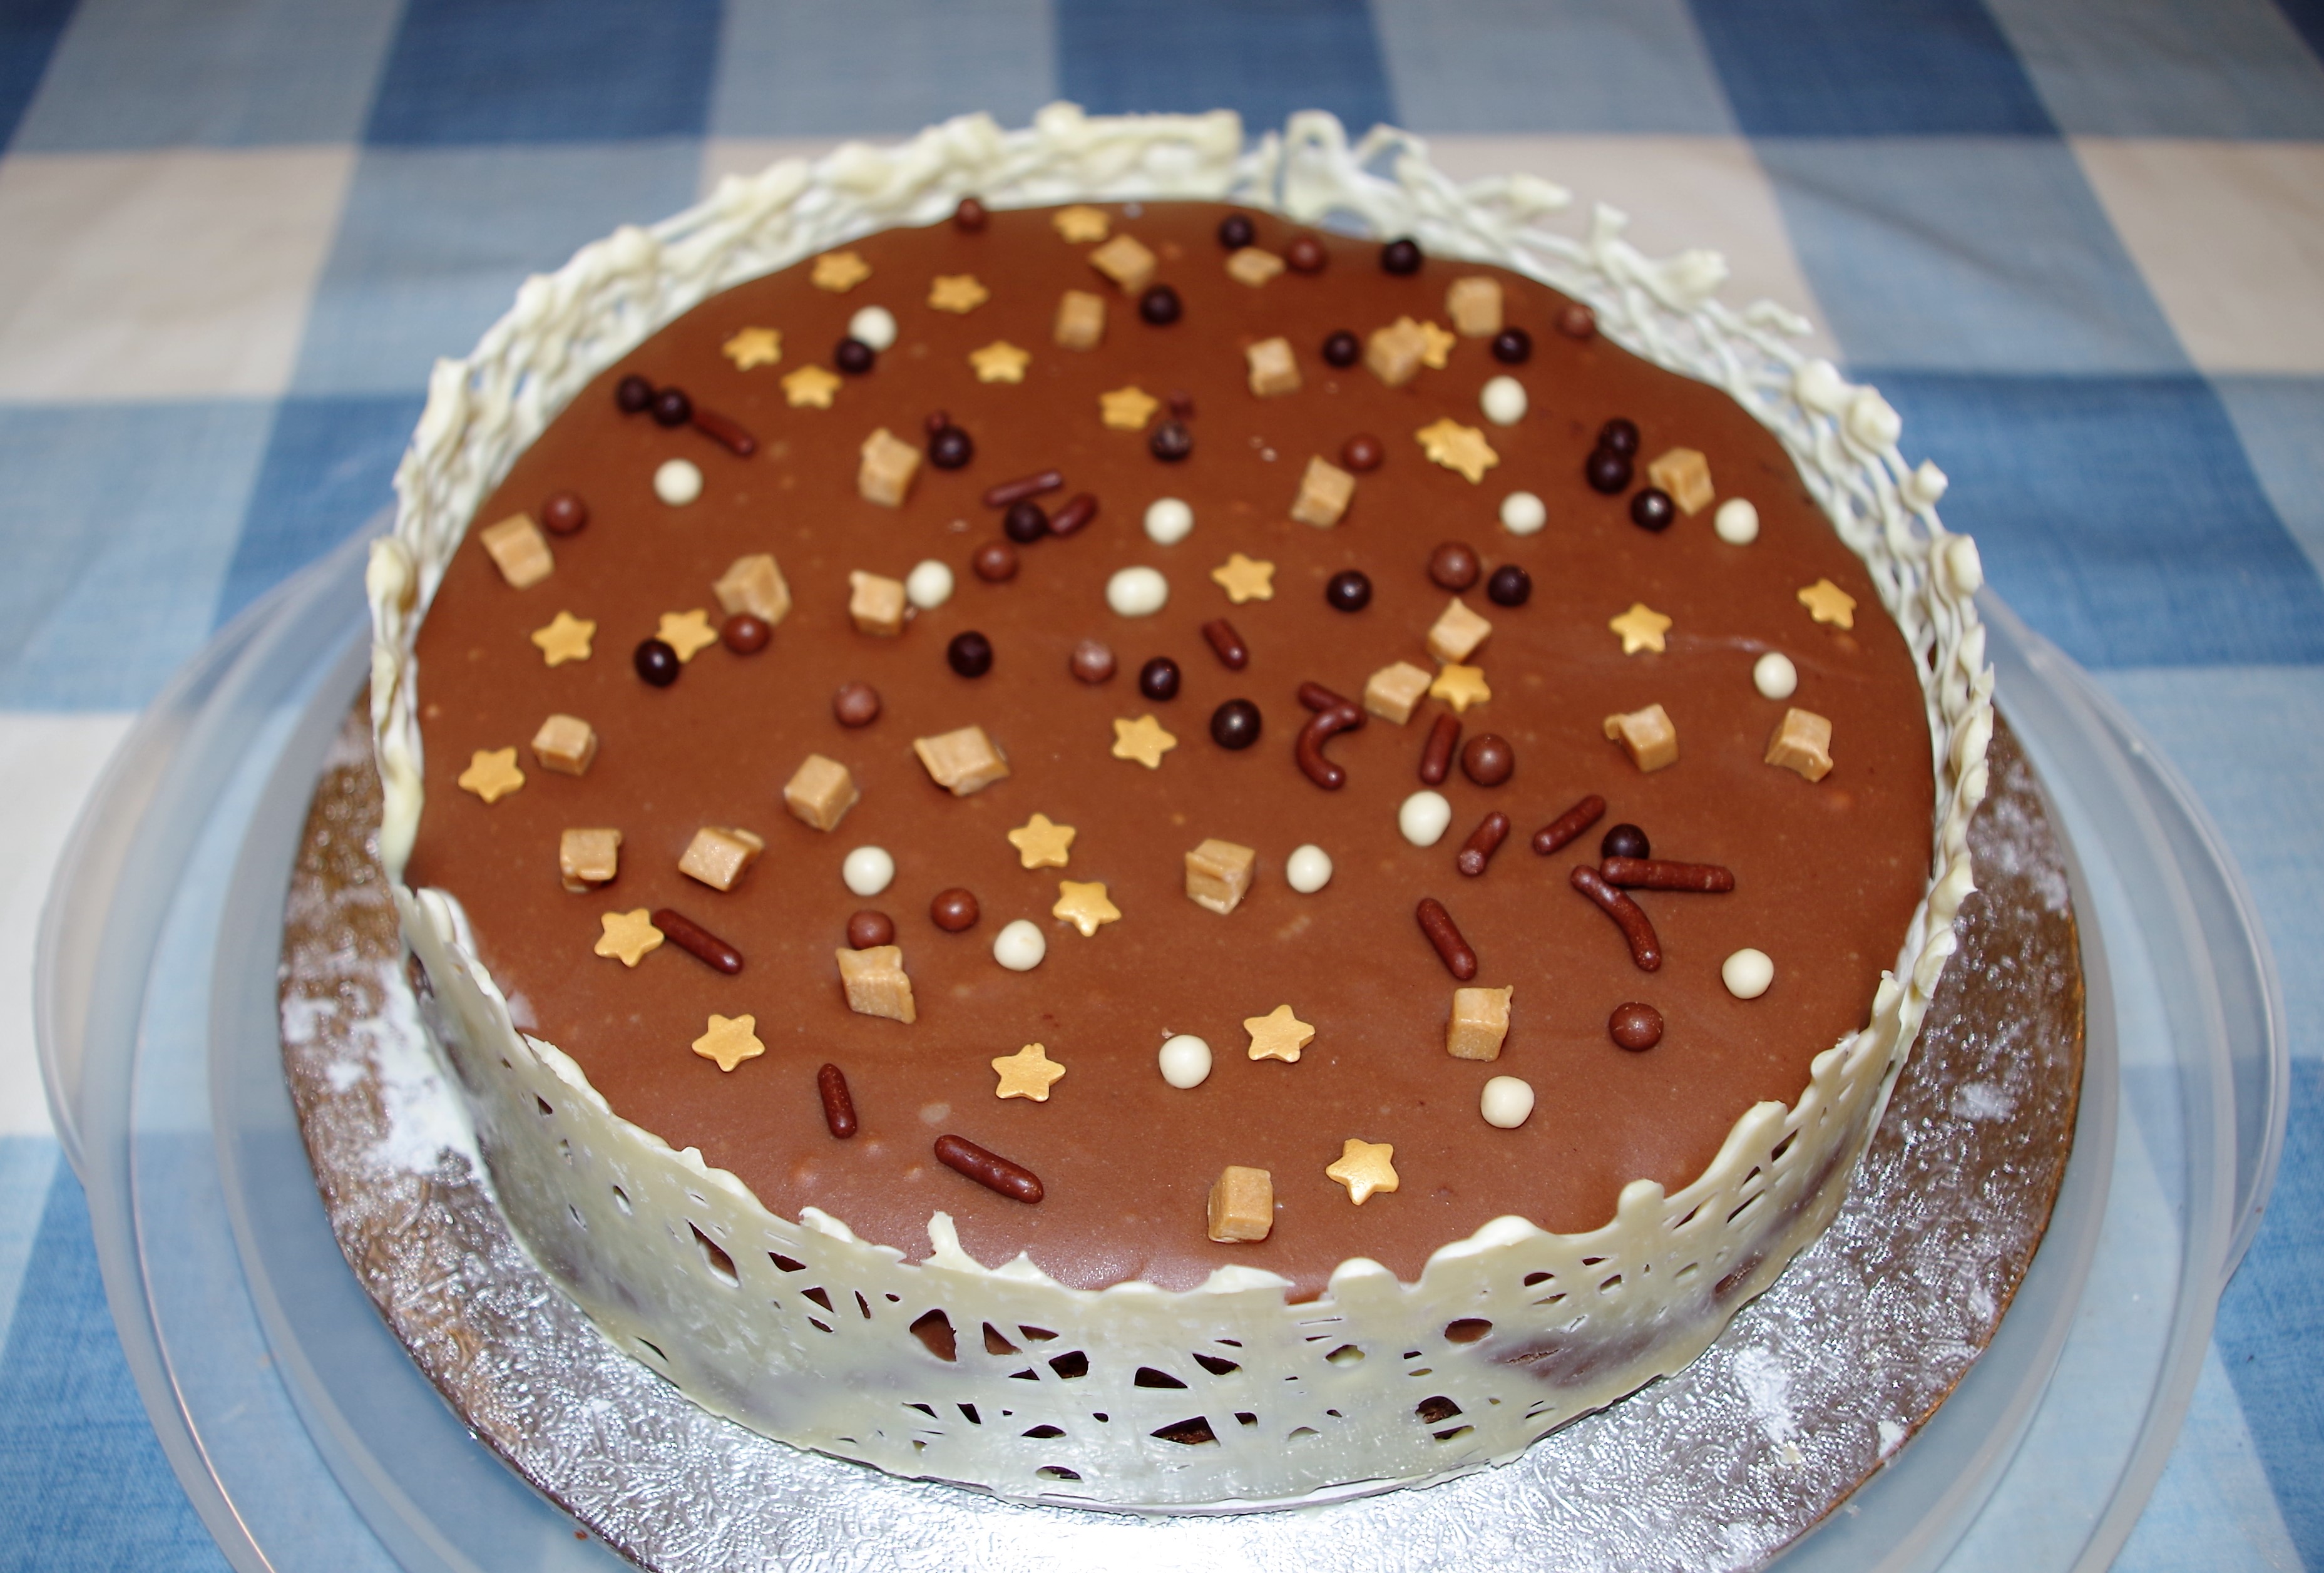
Like chocolate? (Silly question, I know.) Then you’ll love this. But not just chocolate: coffee and caramel too. All blend together to give a lovely rich and shamelessly luxurious treat. The white chocolate collar is optional, but worth the effort, if only to add even more chocolate.
Makes: 10 – 12 slices
Time: Around 90 minutes
Difficulty: fairly easy, but the collar needs a bit of care – and patience (see my comment later)
Need: A 20cm/8″ round cake tin, preferably with a loose bottom
Ingredients
- 2 tsp instant coffee powder or granules
- 2 tbsp cocoa powder, sifted
- 2 or 3 tbsp hot water
- 175g/6oz unsalted butter, softened
- 175g golden caster sugar
- 2 medium eggs
- 2 tbsp golden syrup
- 4 tbsp milk
- 1 tsp coffee extract (optional)
- 200g/8oz self raising flour
- A pinch of salt
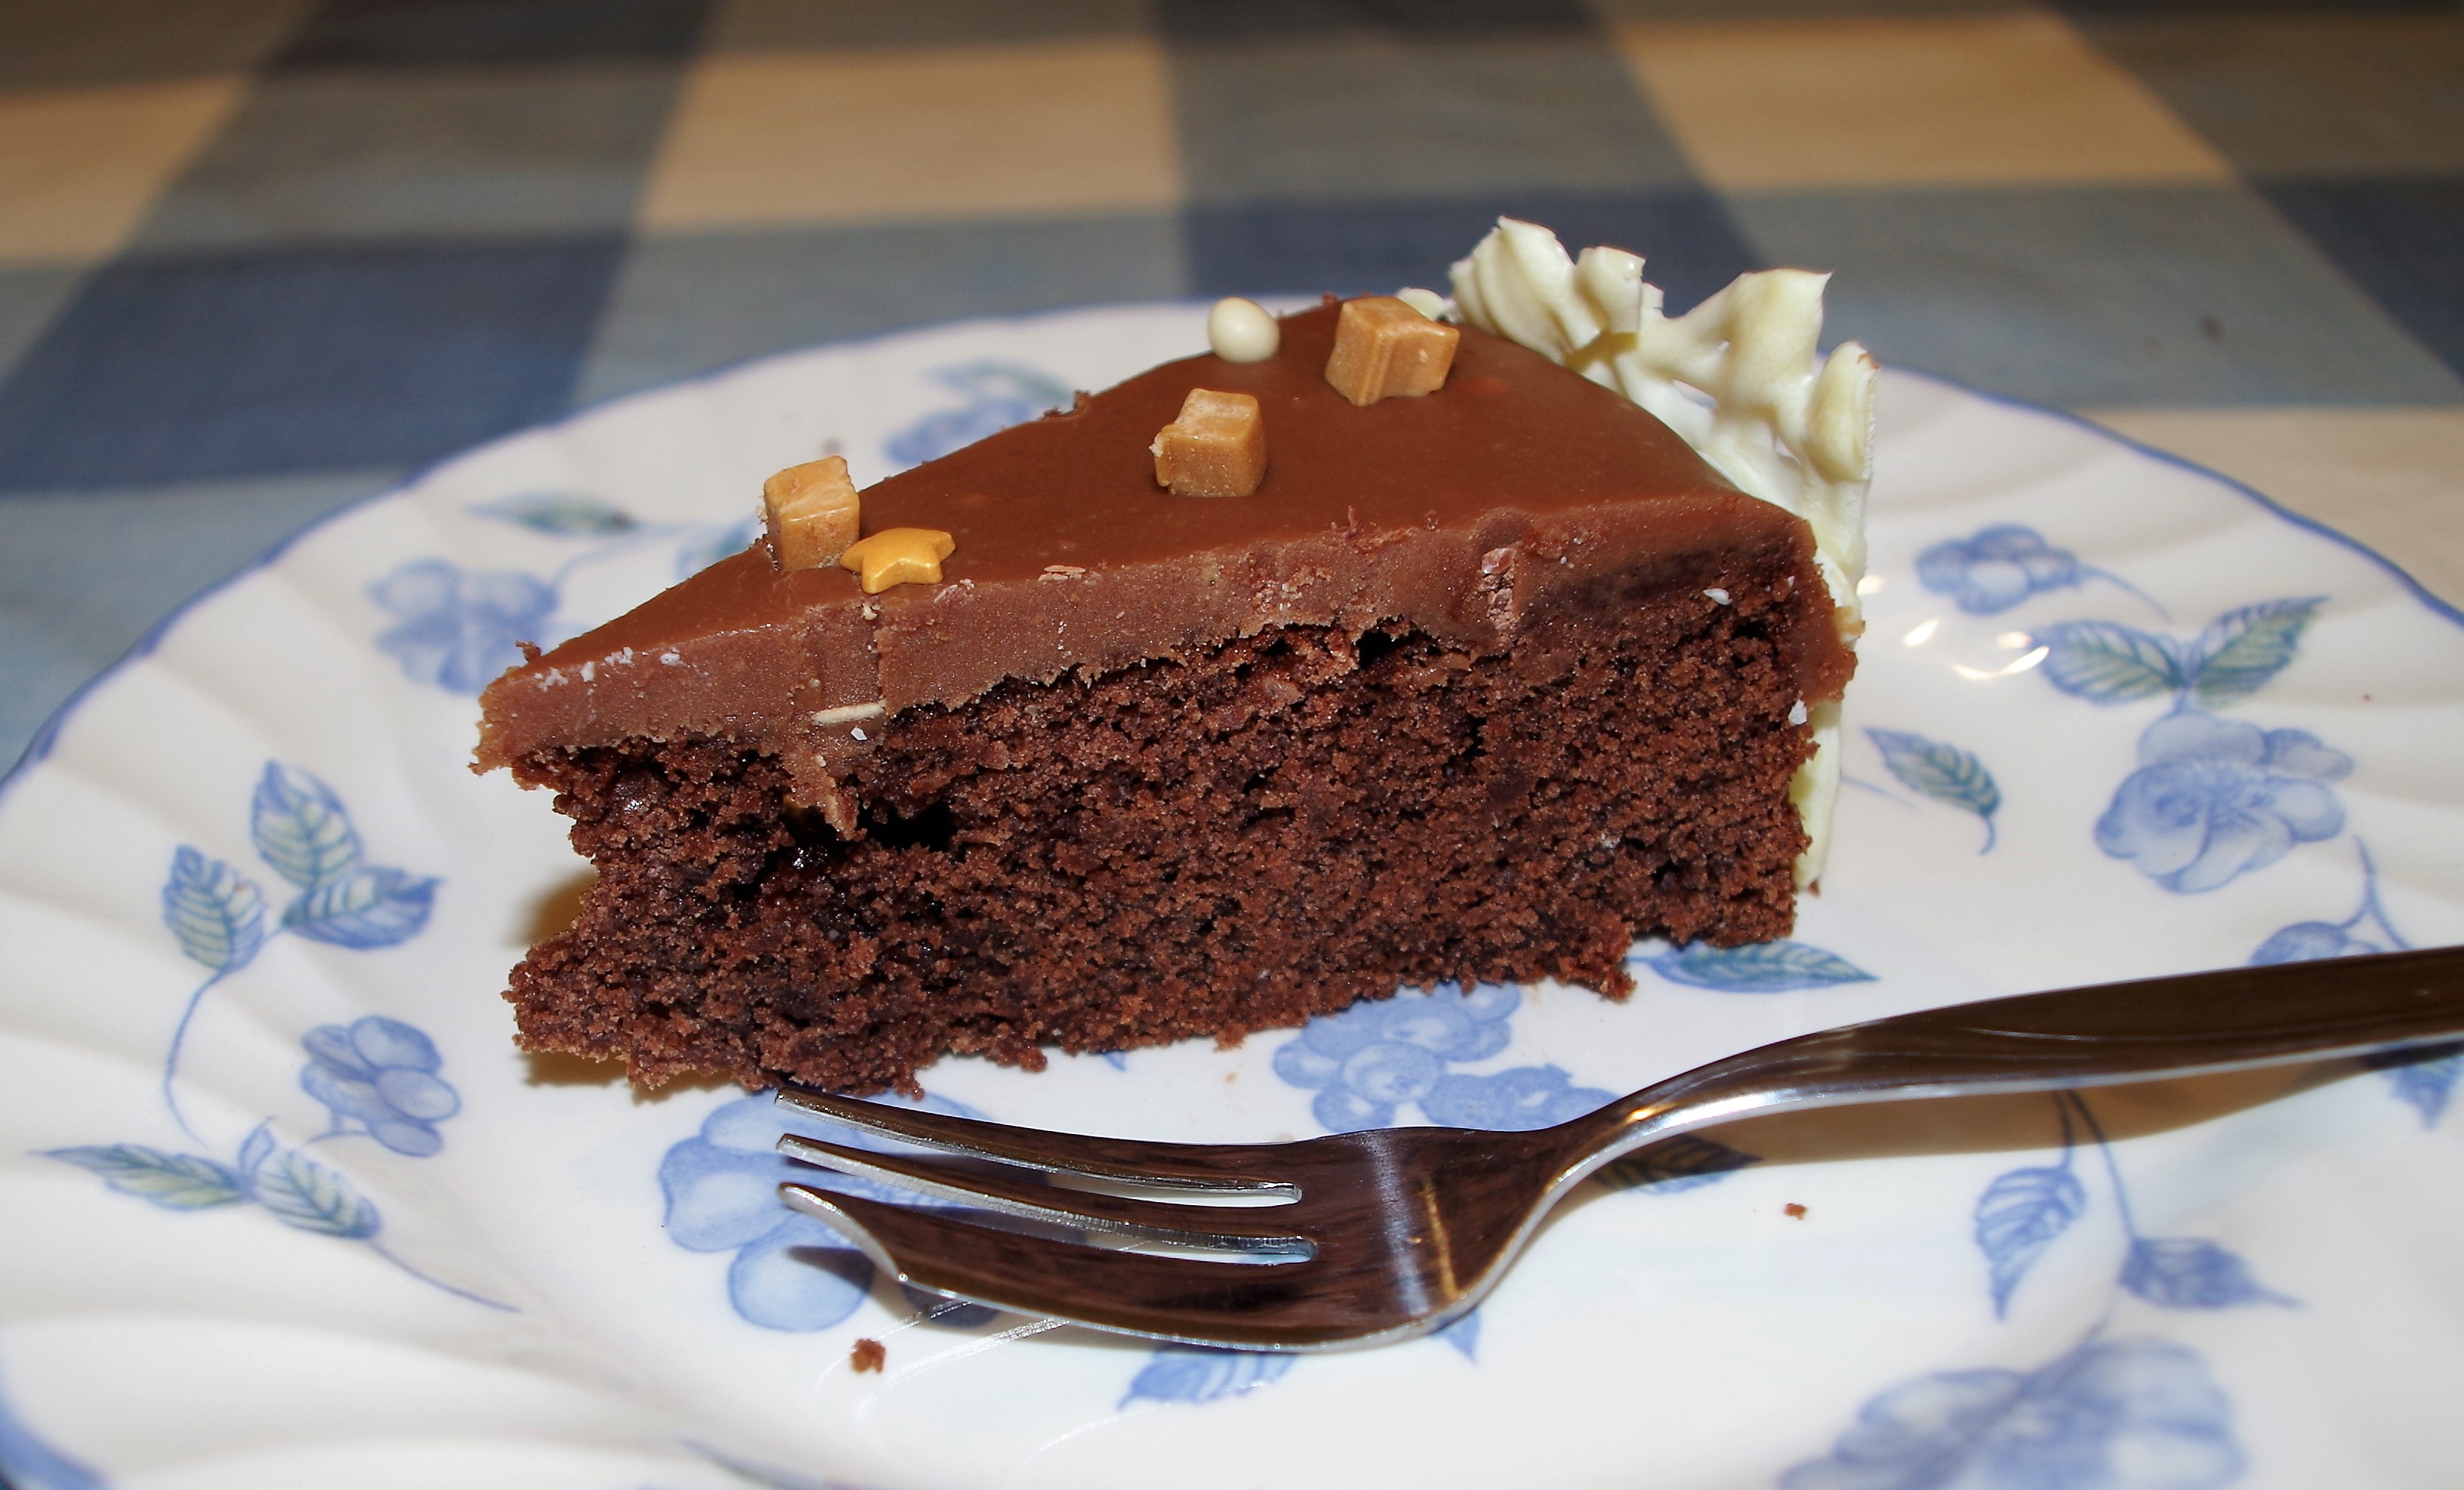
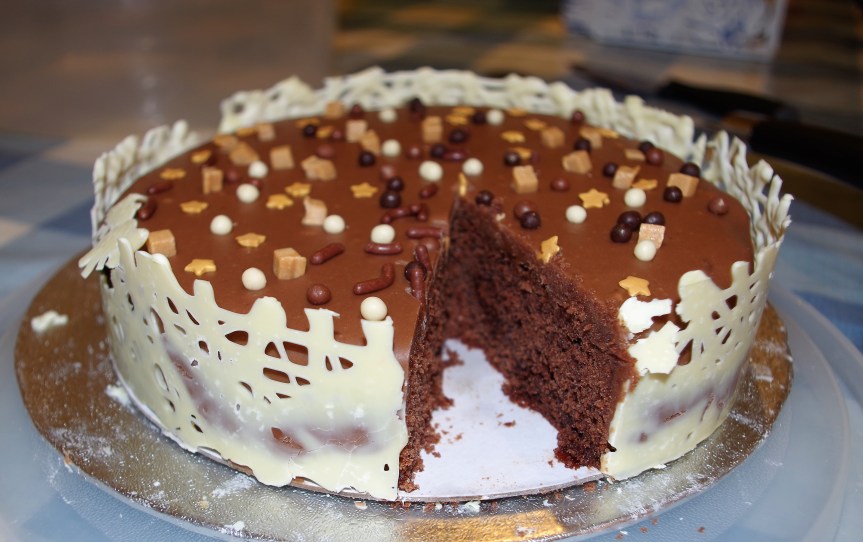
- 100g/4oz caramel bars, chopped (Mars or similar) For the topping and decoration
- Another 100g/4oz caramel chocolate bars
- 50g/2oz unsalted butter
- 2 tbsp milk
- 120g/4oz icing sugar, sifted
- sprinkles or chocolate pieces to decorate
- 100g chocolate pieces (this last item is extra. The ingredients above are the “official” ones, but when I made the cake I thought “what the heck” and chucked in some more chocolate. Not very precise I know, but it tasted good and the extra topping ran down the sides, which helped bond the collar. It’s your choice.) For the optional white chocolate collar
- around 200g of white chocolate
Directions
- Grease and line the base of a 20cm/8″ round cake tin, preferably loose bottomed.
- Turn the oven on to heat up to 180C/fan 160C/350F/Gas 4
- Mix the coffee and cocoa powder with the hot water to create a smooth paste.
- Put the softened butter, sugar, eggs, golden syrup, milk, coffee extract (if using) and coffee paste into a large bowl and mix together well. Sift in the flour and pinch of salt then stir in the caramel pieces. Mix thoroughly.
- Pour or spoon the mixture into the prepared tin and smooth the surface. Bake for 45 – 55 minutes. (and/or test with a skewer.)
- Cool in the tin for 5 – 10 minutes then turn out onto a wire rack, peel off the paper and leave to cool fully.
- For the topping, gently heat the remaining 100g of caramel chocolate pieces with the butter and milk until smooth, stirring all the time. (This is where you can add in the extra chocolate – go on, you know you want to.) Remove from the heat and stir in the sieved icing sugar.
- Leave to cool then spread over the cooled cake. (If you intend making a collar then the topping needs to run down the sides to provide a surface to stick it onto.) Decorate with sprinkles, chocolate pieces, mini eggs, broken Flake bars, more caramel etcetera.Your choice again.
- For the collar, cut an appropriate sized piece, or pieces, of acetate or baking paper. Make sure it’s clean and dry. (N.B. For a 20cm/8″ cake the circumference is 65cm/25″)
- Prepare a piping bag with a small nozzle or snip the end after filling.
- Melt the white chocolate in a bain marie or carefully in the micro-wave and fill the piping bag. Allow it to cool a little, but still be runny.
- Pipe random zig-zag lines of chocolate over the acetate and leave until almost set. (Could be quite some time, it varies) Then attach to the cake and hold in place firmly until it “sticks” of its own accord.
One final embarrassing apology. The white chocolate collar in the above photos is far from perfect. This is because I was too impatient and stuck it on before the chocolate had set sufficiently. Hope you’ll learn from my mistake. (Of course, it still tasted good.)
